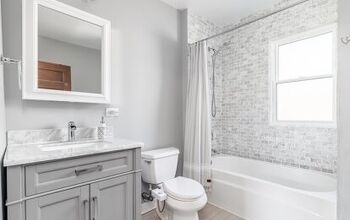
How to Caulk a Bathtub With Wide Gaps
When a bathtub is installed, there are gaps that are purposely left between the tub itself and the wall that is to be adjoined to. This is what is known as an expansion joint. The purpose of this is to allow for a little movement between the position of the tub and the wall it is adjoining.
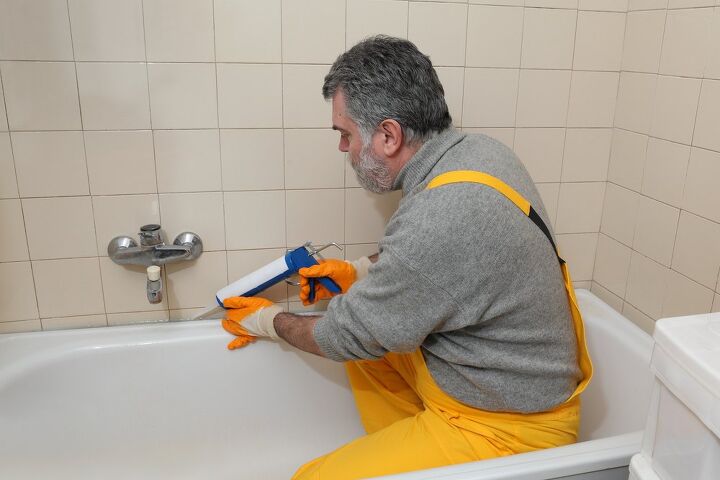
When the positioning has been determined, filling in those gaps becomes of the utmost importance. To fill these gaps, we need to use caulk. It can be as simple as using two beads of caulk next to one another to keep those wide gaps sealed.
Do You Need to Hire a Plumber?
Get free, zero-commitment quotes from pro contractors near you.

Why Caulk?
With improperly filled gaps, water can seep into those gaps and cause damage. This can be in the form of rotted walls or flooring, even mold which can be dangerous to respiratory health.
So, now that we know the importance of that gap and why it need it filled, we come to the sealant: caulk. Caulk is a sealant and filler that is waterproof. It is used in all kinds of building work and general repairs. Generally, caulk is made from silicone so that it can keep the moisture out without soaking it into the caulk itself.
Another great thing about caulk is that it is flexible. The caulk adheres to the gap. Something more rigid could bend and break, creating further issue with the gaps and failing to properly waterproof them.
Gaps Less Than 1/8 Inch
Generally speaking, you should be able to seal and fill those ¼ inch gaps between the wall and tub with one bead of caulk. Be aware of the color of your wall or tile. For tile specifically, pick a caulk that will match up with the color you used for the grout.
Keep in mind: if you have a gap that is smaller than 1/8 inch, you can use regular caulk. Anything bigger, you should use a sanded caulk for the job. This is a distinction that is easily missed by amateur handymen, so be certain to know your gap and the caulk that you are choosing.
Filling in ¼ Inch Gaps
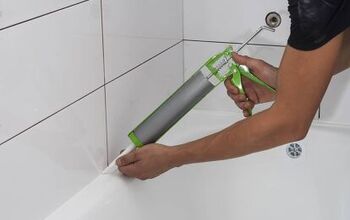
You will be able to use seal (that matches the grout you used) gaps of up to ¼ inch with standard caulk. The first thing to do is make sure that the gap is completely clean of any debris or dirt. When you have wiped it thoroughly, dry the gap so that the caulk can properly adhere.
When the space is ready to be filled, you will need to squeeze out a thin bead to fill the gap between the tub and wall. For optimal coverage, you can actually cut the tip of your caulking tube to allow the bead to completely fill in the gap as it comes out.
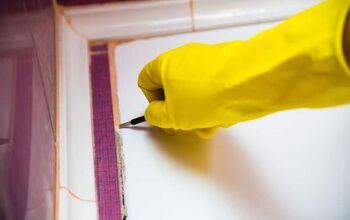
After you have filled in your gap, you need to smooth it out. You can wet down a finger and smooth out the caulk by hand after it has filled the gap. It doesn’t need to be perfect, but the smoother the caulk is the better aesthetic it will have.
Filling in ½ Inch Gaps
If you have a gap that is somewhere between the ¼ and ½ inch range, the process is generally the same. The only difference is that you would want to use two beads of the caulk instead of just one. The key here is to set them side by side within the gap.
Start out by applying a bead of caulk right along the edge of the tub. The second bead will go right on the edge of the adjoining wall. When you have filled in the gaps on both sides with the caulk, now comes the time to smooth it out.
You can use a wet index finger as you did before to join the two beads together but do this carefully. There is a possibility that you could push the caulk in too far. When this happens (or if you know beforehand that the gap is quite deep), you will have to remove the caulk and go another route.
Filling in these types of gaps can be tricky without prior experience and may require doing it a time or two. If you don’t do it right the first time, that’s okay. Just make certain that it has been done correctly when you are done filling in all of the gaps.
Backer Rods
For anything bigger than a half inch, you will need to use a different technique to ensure that the gap has been properly filled and sealed. Deeper or wider gaps, up to 6 inches, should have a backer rod used before the application of the caulk.
A backer rod is a flexible tube made of foam that has different levels of density depending on the kind that you get. A backer rod can come in a wide range of materials, so be aware before making your purchase. Get one that is made for moist or wet areas. Also, make sure it is nonporous. This means that it won’t absorb any of that water or moisture.
Wide or Deep Gaps
When you have picked up a backer rod, now comes the time to fill in those extra wide or deep gaps. To start, push the backer rod into the gap. The top of the backer bar should be just below the surface of the tub and should fill in the gap entirely.
After the backer rod is in its proper place, you can begin to squeeze out a beak of the caulk on both sides of the rod (where it joins to the wall and tub) in order to seal the space. You will not be able to fill this space with caulk alone; the gap is just too wide to properly fill in without the support of the backer rod.
Using a Tub Flange
There are some tubs that actually come with a lip built in. There are others, however, that need a large, L-shaped flange to close off those medium-sized gaps that will occur between the wall and the tub. It is similar to the backer rod in that it is meant to give the caulk something to latch onto to close the gap.
The horizontal part of the flange will attach to the tub’s edge. The vertical part will extend up. This will be hidden by the tub or tile over it. If you are in the initial stages of the installation and see that there is a large gap, using a flexible flange may be the way to go.
Do You Need to Hire a Plumber?
Get free, zero-commitment quotes from pro contractors near you.
Installing the Flange
Place the flange into the according gaps as outlined above. When you finally have the flange in place, you will need to install the tub so that the top of it will cover the flange. When you have finished the wall side of the flange, use a bead of caulk over the top to give the finished look that the tub needs.
The flange will provide support and fill in the gap without having to use a lot of caulk. This can be mitigated if your tub has that built-in lip mentioned previously but this is a worthwhile solution otherwise.

We are a team of passionate homeowners, home improvement pros, and DIY enthusiasts who enjoy sharing home improvement, housekeeping, decorating, and more with other homeowners! Whether you're looking for a step-by-step guide on fixing an appliance or the cost of installing a fence, we've here to help.
More by Upgraded Home Team