How To Build Double Shed Doors (Step-by-Step Guide)
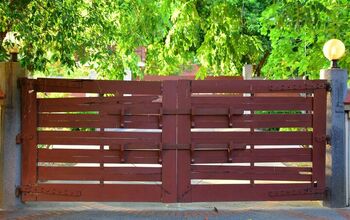
In order for a shed to be secure and protected from the elements, it must have heavy-duty doors. Double doors will protect the contents of your shed and give you options for the size of the opening. Building double shed doors is easy with the right planning and tools.
To build double shed doors, first measure your shed’s door opening. Then, build 2×4 frames and fill them with the siding of your choice. Hang the double doors and secure them with a locking latch.
There are many options for materials and designs for double shed doors. In this article, we will focus on a simple design that is accessible to everyone. This is a fairly easy job that can be done in an afternoon.
Do You Need to Hire Shed Installers?
Get free, zero-commitment quotes from pro contractors near you.

Materials
- 2x4s: Two-by-fours are accessible and available in any big box hardware store. They will make up the door frames that the siding will hang on as well as the jambs and door lentil.
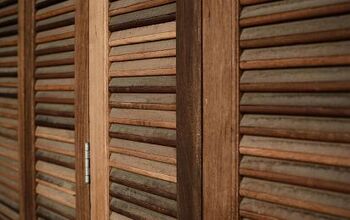
- Siding: There are many types of siding that you can use to fill your door frames and make up the surface. However, it is recommended that you use T1-11 or LP siding panels. These are readily available and if you have built your own shed, you will already have some.
- Hinges: T-hinges are the most popular type of hinge for double shed doors. These can range from flimsy to incredibly heavy duty. Depending on your budget and needs, you may want to get a heavier type T-hinge that can take more use.
- Latch: Your security needs will determine what type of latch you use. Ring latches can be padlocked as can a bolt latch. Bolt latches are the most popular type for double shed doors since they prevent them from being pulled open.
Tools
- Circular Saw: A circular saw is your best bet for the types of cuts you need to make for this project. Always be sure that you observe safety protocol with any power tools. The circular saw I will allow you to make the kinds of precise cuts needed to fit the doors.
- Drill: Any kind of power drill is suitable for this project. It’s possible to do this project with hand tools like a screwdriver as well but it will be tough on your wrists. A power drill will also ensure that your fasteners are secure.
- Measuring Tape: Precise measurements are key to this project. Always measure twice before making any cuts. This will help you avoid any wasted materials.
- Level: Making sure that the double doors are level is another key technique for this project. Level doors will ensure that they don’t rub against each other as they open and close. This will help you avoid splintering and more damage.
Step 1: Measure Door Opening
Measure the opening of your shed door. You are going to want your doors to be the same size but cut in half. You will use this measurement to cut the siding. Because of this, it is the most important measurement you will take and must be done with care.
For the most part, shed doors are going to be 5 feet. This gives you enough room to store larger tools like lawnmowers or wheelbarrows. By building double doors, are you also giving yourself the option of the smaller two and a half foot door.
If your shed has a ramp, make sure that you give yourself enough clearance on the bottom to clear the ramp. This can cut as much as 2 inches from the bottoms of your doors.
Step 2: Cut the Siding
Once you have measured your door opening, you can cut the siding to those specifications. This will allow you to accurately cut it and will make framing it up easier. Depending on the type of siding you have, there may be a few extra steps you need to take.
Some types of siding have a cleat on the side that allows the sheets to lock together. Generally, you don’t want this on the siding you’re using for your double doors. It can get in the way of the latch and make the doors not fit together.
T1-11 siding has this cleat on the side. You will want to shave it off with a circular saw to create a flush edge. This will make the siding much stronger and give it a tighter, more secure fit in the doorway.
Step 3: Build the Door Frames
After you have cut the siding to the correct size, you can frame it up with the 2x4s. It is best to do this from the back of the siding with 1.5-inch outdoor screws. This will ensure that the framing is secure and won’t show on the outside.
Build your frames with the 2×4 on the top horizontal and the vertical ones reaching all the way to the bottom. Then attach another 2×4 between the vertical ones at the bottom and in the middle. These are called stiles.
The stiles are crucial to the structural integrity of the door frame. Attach these to the vertical framing with larger screws if necessary.
Step 4: Hang the Doors
Now that you have built the door frames completely, you can hang them. You can place blocks underneath the doors to support them while you place the hinges. Either that, or you can have a helper hold them up while you mark them up.
Attach two more 2x4s on the sides of your door opening. These will be the door jambs. They are where you will attach the hinges and what the doors will hang from, so make them as heavy-duty as possible.
Use your level to ensure that the doors are hanging straight and attach them with the included hinge hardware.
Step 5: Latch the Doors
After your doors are hung, you can finish them off with the latch. Check the swing of the doors and make sure that they can move freely and don’t scrape on the ground. If you have a ramp that must be installed, do it at this point and ensure that it doesn’t block the doors.
Fasten the latch to the doors and padlock them closed. Do a few more tests of the door’s swing to check for any clearance issues. Your shed is now secure and your tools are safe from all kinds of dangers.
Do You Need to Hire Shed Installers?
Get free, zero-commitment quotes from pro contractors near you.
Related Questions
Should a shed door open in or out?
A shed door should always open into the shed instead of out. This will ensure that on windy days, the door will not get ripped out of your hand and possibly break something. However, you will have to make sure that there is room inside for the door to swing open.
How do I build a watertight shed door?
You can make your shed watertight by using weather stripping. This will be attached anywhere the doors don’t make contact with the jambs and cracks may form. You can apply it to both the door and the jamb to ensure it stays watertight.
Why is my shed wet inside?
Sheds are breeding grounds for moisture. They get damp inside from moisture building up and not having anywhere to escape to. You can mitigate this by installing small vents or a window for the damp air to escape through.

I am a writer and editor from The Bay Area, CA. When I'm not typing, I enjoy hiking, woodworking and gardening. I love sharing tips and discovering new trends in home improvement.
More by Michael Oconnor