


How Tight Should Toilet Tank Bolts Be? (Find Out Now!)
Under optimal conditions, your toilet should remain sturdy and stable at all times. It needs to be so in order to ensure that there are no leaks. After all, leaks are one of the worst situations related to your toilet that you can experience.
The question becomes just how tight the tank bolts should be. There is no definite answer but there is something that should work just fine. Tighten the bolts until they are snug and then give them a couple more turns. You want the tank to be secure but don’t want to damage the porcelain by overtightening.
Do You Need Handyman Services?
Get free, zero-commitment quotes from pro contractors near you.

Should My Toilet Tank Wobble?
Most of the time, you won’t have to concern yourself with tightening any of the components of your toilet. That said, you may notice that the tank wobbles a bit from time to time. Even if the wobbling is just a little, you would want to resolve the issue sooner rather than later.
The most likely solution is to tighten a loose bolt that keeps the tank attached to the bowl. That can mean all the difference in the world, giving you a tank that does not move versus one that wobbles from time to time.
Why is it Important to Have a Tight Connection?
While it might not seem like a big deal, it is important to ensure that your toilet tank is as secure as it can be. For one, the tank is quite heavy. That kind of weight on a loose or unstable connection can potentially put pressure on the bolts and cause them to strip.
There are a litany of other issues that may arise from a loose toilet tank. Whenever you notice any movement in the tank, it is important to tighten down the bolts sooner rather than later.
How to Tighten Toilet Tank Bolts
The good news is that the process for tightening the tank bolts is a relatively quick and easy one. The good news is that you can also get the job done with just a screwdriver and an adjustable wrench. Both are common household tools that most DIYers have in their repertoire already.
Follow these simple steps to tighten your toilet tank. It will prevent a lot of potential issues from coming to fruition over time.
Step 1: Turn Off the Water
Whenever you work with the toilet in any capacity, it is important that you start by turning off the water supply. The knob for the supply is generally either behind the toilet or to the left of it for easy access.
Turn the knob clockwise until it doesn’t turn anymore. This will ensure that there is no water flow to the tank so that you can continue working. With the water off, you can then go ahead and remove the tank lid. Set it off to the side so that it doesn’t fall and chip or becoming otherwise damaged.
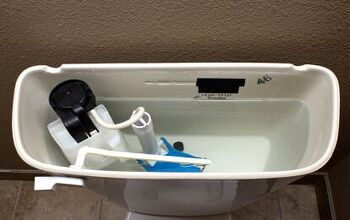
Step 2: Empty the Water From the Tank
Now that we are certain no more water will flow into the tank, it is time to do something about the water already there. The simplest way to do this is to simply flush the toilet. Hold down the lever until the tank has completely emptied.
We want to empty the tank of all of its water to give us greater ease of access to the bolts. Even if it were possible to get to the bolts with the tank full, it would be a huge mess. We want to try to avoid messes where we can when it comes to the toilet.
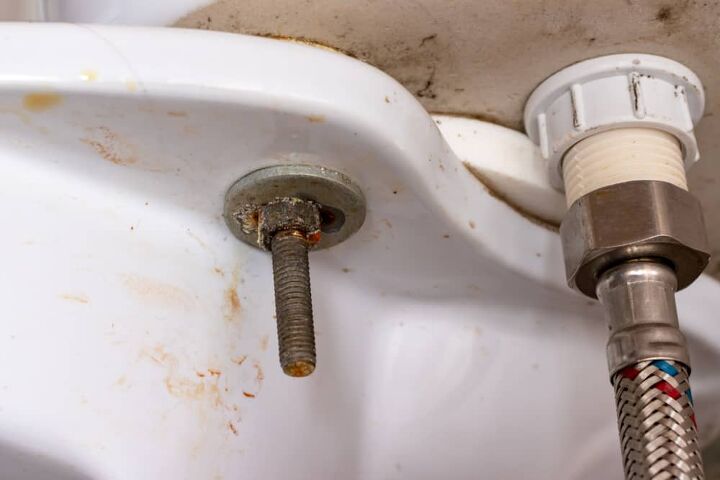
Step 3: Tightening the Bolts
Using the end of a screwdriver, slide it into the head of one of the bolts on the inside of the tank. With your other hand, hold the nut in place with your adjustable wrench. Make sure that your grip is secure, otherwise you will just wind up turning the nut too and nothing will happen.
Turn the screwdriver, not the wrench, in two full clockwise revolutions. Repeat this process with the other bolts in the tank. Make sure that you alternate tightening each of the bolts until they are pulled tight to the inside of the tank. More importantly, you should not be able to turn the screwdriver anymore.
You can then use the wrench to tighten the bolt a bit further but use caution. Overtightening could potentially crack the porcelain. That is a whole new problem that you should try to avoid any way that you can.
Step 4: Check Your Work
Grab a rag and dry the area that surrounds the connection between the bowl and the tank. Grab a torpedo level for this next part. Place the level at the front edge of the tank and make sure that it is sitting level on the toilet bowl.
If the tank isn’t quite level, go back to carefully tightening then mounting bolts. With enough tightening, the tank should sit level with the bowl and your job will be finished.
Step 5: Test it Out
When you feel comfortable that the bolts have been properly tightened and the tank is level with the bowl, it is time to fill the tank up once again. Turn the water valve on and allow it to fill the tank up to just below the top of the overflow pipe.
Keep an eye on the area around the tank and on the floor. If it is dry, you are good to go. If not, then the next few steps will be necessary.
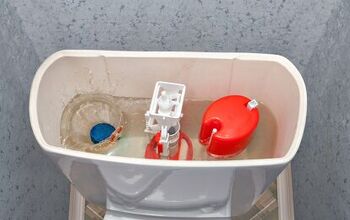
Step 6: If There’s a Leak
Should you notice water leaking from the tank even after tightening, then you will have to try something else. Turn the water off again and drain the water from the tank. Hold the mounting bold by the head with your screwdriver while working the nut counterclockwise.
Pull the bolt out, following all the way around until all of the bolts have been removed. Take the tank off of the bowl and turn it upside down. Find the gasket and pull it away from the bottom of the tank. Put a replacement gasket in its place.
Finally, put the tank back into position and tighten all of the bolts. Remember to alternate tightening as you go until the tank sits level with the bowl. Turn the water back on and allow the water to reach the proper levels in the tank. You should now be leak-free.
Do You Need Handyman Services?
Get free, zero-commitment quotes from pro contractors near you.
Related Questions
Can a Loose Toilet Cause a Leak?
Yes, a loose toilet can absolutely lead to a leak. It can cause a leak at the sewer line which could then flood your bathroom flooring. Leaks are nothing to mess with. Even if you get to the problem in short order, it can mean rotted wood as well as problems with mold and mildew.If you don’t notice a leak, things can get worse. More than a few floors have been totally destroyed by a leak that went unnoticed. That means shelling out to fix any issues or replace the flooring entirely if need be.
Why Does My Toilet Move Side to Side?
If your toilet as a whole is shifting from side to side, that is because it is not sitting flush to the flooring. There is a toilet flange that connects the drain pipe and the flooring. When the flange sits higher than the rest of the flooring, the toilet will be raised slightly. That is why it rocks slightly.

Ryan Womeldorf has more than a decade of experience writing. He loves to blog about construction, plumbing, and other home topics. Ryan also loves hockey and a lifelong Buffalo sports fan.
More by Ryan Womeldorf


![Standard Dining Room Table Dimensions [for 4, 6, 8, 10 and 12 People]](https://cdn-fastly.upgradedhome.com/media/2023/07/31/9074335/standard-dining-room-table-dimensions-for-4-6-8-10-and-12-people.jpg?size=350x220)

![12 Washing Machine Brands to Avoid [with Recall Data]](https://cdn-fastly.upgradedhome.com/media/2023/07/31/9075781/12-washing-machine-brands-to-avoid-with-recall-data.jpg?size=350x220)

