How Long Does It Take To Charge A Lawnmower Battery?

Like your car, your riding lawnmower uses a battery to help kickstart the ignition. Also, like your car, this piece can die from time to time. When that happens, you may need to charge the battery so that you can start cutting the grass again.
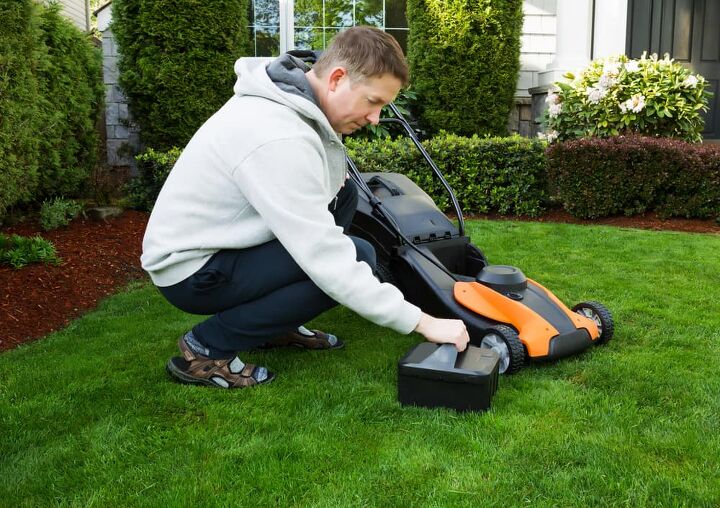
Typically, when using a lawnmower battery charger, it will take about one to two hours to get a full charge, depending on the number of amps you’re using. If you’re charging a battery for an electric mower, it will take roughly the same time, although some models may take longer.
Although charging your lawnmower’s battery is simple enough, there are plenty of details to know before getting started. This article will outline the steps to take when charging a battery and how the process works.
What You’ll Need to Charge a Lawnmower Battery
- Battery Charger
- Work Gloves
Step by Step Guide to Charging a Lawnmower Battery
Step One: Position the Mower
A lawnmower battery charger is essentially distilling the electricity that comes from your outlet. Because of this, you will have to be close to a power source to charge the battery. Alternatively, you can remove the battery itself to make it more portable. However, that will add extra steps, so we don’t recommend it if it isn’t necessary.
Step Two: Access the Battery
In some lawnmower models, the battery is located underneath the driver’s seat. Refer to your owner’s manual for reference.
Step Three: Connect the Wires
You will want to start with the positive terminal first (red) and then connect the negative terminal. Be careful to avoid touching the clamps to any other metal pieces, as it could damage the charger or the battery itself.
One thing to keep in mind is that you don’t have to disconnect the battery from the engine while charging. The system is insulated enough to prevent any sparking or internal damage.
Step Four: Plug in the Charger
Once the connections are made, you can plug the charger into an outlet. If this piece has a 12-volt setting, make sure to set it to that before starting. Older mowers use a six-volt battery, so you want to be sure that your machine is compatible. Unless you have a vintage riding mower built before 1980, you shouldn’t worry about this.
Step Five: Let the Battery Charge
The number of amps will determine how quickly you can charge the battery. The maximum number to use is 10 amps, as any more than that will overload the system and cause damage. At a full 10 amps, it should take about an hour to charge. If your charger uses fewer amps, it will take longer.
In some cases, there may be a slow-charging option that uses two amps. This setting will take several hours to complete, but it will ensure that the battery gets charged 100 percent.
Step Six: Unplug the Charger
Whenever touching the battery terminals, you need to ensure that no electricity is flowing through the system. Unplugging the charger will keep you and the battery safe.
Step Seven: Disconnect the Cables
Do this in the reverse order. So, start by removing the negative cable (black) and then the positive one. Again, be sure to avoid touching any metal pieces with the clamps until they are clear.
Step Eight: Start the Mower
Now that the battery is charged, you should start your lawnmower to see if it engages immediately. If it doesn’t, then you could have a faulty spark plug or solenoid. However, most of the time, the spark plug is to blame. If that is the case, you can find out how to change a spark plug here.
How Battery Charging Works
If you’re unfamiliar with lawnmower or automotive batteries, they use sulphuric acid and lead to hold a charge. The toxicity of these elements is why you have to take your spent batteries to a waste disposal site. Over time, the acid will leak out, which can be a health and safety hazard.
When it comes to charging your mower battery, the system works by filtering the energy coming out of your home. There are three components to understand: amps, watts, and volts. Here’s a quick overview:
- Amps – The amount of electricity flowing through the system. You can think of it as the flow of water coming through a pipe.
- Volts – The amount of energy required to move the electricity through the system. This would be equivalent to the water pressure in a pipe.
- Watts – The energy used by a device. This would be like the amount of water coming out of the pipe.
Lawnmowers use 12-volt batteries (similar to a car), which means that they have six cells that generate two volts each. When charging the battery, the number of amps will dictate how much electricity flows into those cells. You don’t have to worry about wattage unless you’re trying to power a device with your battery, which we advise against.
Safety Tips When Charging a Lawnmower Battery
Fortunately, modern battery chargers have built-in safety functions, such as automatic shutoff and reverse polarity protection. However, if you’re using an older device, keep these safety tips in mind:
- Wear Gloves – If you accidentally touch the tip of the clamps, you will get a shock. Gloves can prevent any nasty surprises.
- Don’t Leave the Battery Charging for Too Long – Most chargers will shut off once the battery is full, but old models can overcharge. If that happens, it could cause an acid leak.
- Never Use Too Many Volts or Amps – While it may be tempting to speed the process by using a higher amp charger, that will overload the cells and damage the battery. Then, you’ll have to buy a new one.
Top Reasons Why a Lawnmower Battery May Need Charging
Realistically, you shouldn’t have to charge your lawnmower very often. Nonetheless, here are some situations where it might come up.
- Ignition Switch Left On – If you leave the key inside the mower for convenience, you might not disengage the ignition all the way. Since you likely don’t mow more than once or twice a week, the small output could drain the battery.
- Start of Season – When pulling your lawnmower out in the spring, the battery might be dead, forcing you to charge it before you can start cutting.
- Long-Term Storage – If you have a mower that has been sitting for years, the battery is almost certainly drained. In some cases, you might have to replace the unit.
- End of Season – To help avoid corrosion and a dead battery next spring, many manufacturers recommend charging your system before putting the mower away for winter.
How to Replace Your Lawnmower Battery
A dead battery can happen on occasion, particularly if the component is old. However, as long as it holds a charge well enough, you don’t have to replace it. That being said, if you find yourself having to jumpstart your lawnmower every time you want to cut the grass, the battery will need replacing. Follow these steps to do it.
- Step One: Locate the Battery – As we mentioned, it will likely be underneath the driver’s seat.
- Step Two: Disconnect the Terminals – Start with the negative (black) one first. If you see signs of corrosion, you can clean it with a mixture of baking soda and water.
- Step Three: Remove the Battery – In some cases, there may be a metal bar holding it in place. You might have to get a screwdriver to remove it.
- Step Four: Inspect for Leaks or Corrosion – If there is acid on the battery box base, you will want to clean it with a towel and the baking soda solution.
- Step Five: Insert the New Battery – Replace the metal bar if there is one.
- Step Six: Reconnect the Terminals – Do this in the reverse order, so start with the positive (red) terminal and then the negative one.
- Step Seven: Start the Mower – Doing this ensures that everything is connected correctly. If you still have trouble starting the machine, the spark plug is likely to blame.
Related Questions
Can I charge my battery with my car?
Technically yes, but we don’t recommend it. If anything, you can jumpstart your lawnmower by connecting it to your car, but it is not advisable for charging.
Can I charge my battery by plugging it into an outlet?
If you mean plugging it in directly, no. Outlets usually generate 110 volts, which is way too much electricity for your battery. It will overload almost immediately and start smoking and leaking acid.

We are a team of passionate homeowners, home improvement pros, and DIY enthusiasts who enjoy sharing home improvement, housekeeping, decorating, and more with other homeowners! Whether you're looking for a step-by-step guide on fixing an appliance or the cost of installing a fence, we've here to help.
More by Upgraded Home Team


![The 10 Best Table Saws - [2022 Reviews & Buyer's Guide]](https://cdn-fastly.upgradedhome.com/media/2023/07/31/9070645/the-10-best-table-saws-2022-reviews-buyer-s-guide.jpg?size=350x220)


![How Much Weight Can a 4×4 Support Horizontally? [It Depends!]](https://cdn-fastly.upgradedhome.com/media/2023/07/31/9070333/how-much-weight-can-a-44-support-horizontally-it-depends.jpg?size=350x220)


