How Is A Kitchen Island Attached To The Floor? (Find Out Now!)
Are you interested in adding an island to your kitchen, but not sure of the logistics? A kitchen island adds storage and functionality to your kitchen, and it’s also a fantastic design element. But does it need to be attached to the floor, and if so, how?
Some small kitchen islands are freestanding cabinets or carts on wheels. Most kitchen islands, however, are attached to the floor underneath with wooden cleats. The island fits snugly on top of these cleats, keeping it from shifting position. Some choose to bolt the island to the cleats for extra stability and security.
Do You Need to Hire Cabinet Installers?
Get free, zero-commitment quotes from pro contractors near you.

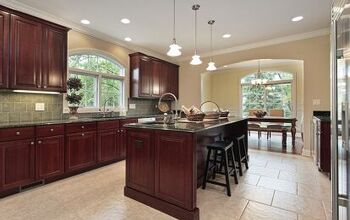
What Is A Kitchen Island?
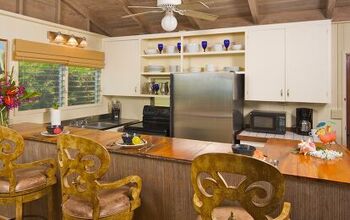
A kitchen island is a freestanding cabinet with extra counter space on top. It may match or complement the existing kitchen decor. Often, people will put stools around the island to serve as extra seating or dining area.
Some kitchen islands are hooked up to plumbing and have an extra sink. Others serve as additional storage for small appliances, pots and pans, and other odds and ends.
How Is A Kitchen Island Attached To The Floor?
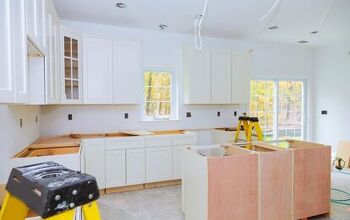
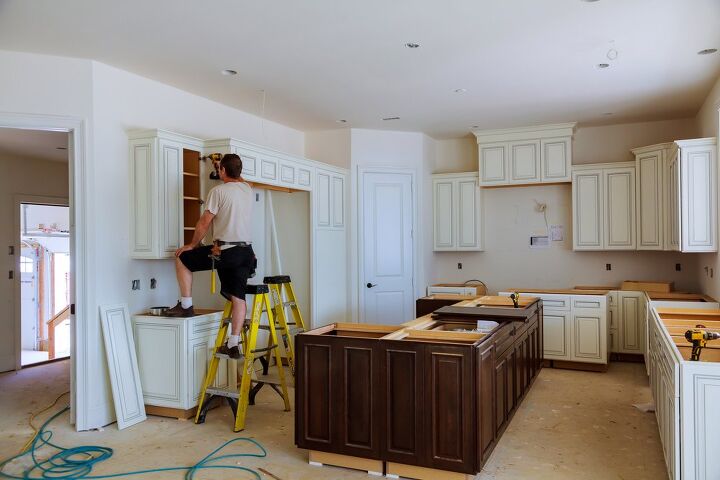
Not every kitchen island is attached to the floor. Some have wheels and can be moved in and out of the kitchen as needed. Others are anchored to the floor for stability. Here, we’ll go through the step-by-step process of attaching a kitchen island to the floor.
For this project, we’ll be anchoring the island to the floor using wooden cleats made from 2x4s. These cleats will be bolted into the floor, and then the island will be bolted into the cleats.
Step 1: Position The Island
First, you’ll need to figure out exactly where you want to put your island. Be sure to leave plenty of space on the sides for people to move around. Generally, 48 inches is enough, or if you have a dining counter on one end, allow 60 inches of space.
Once you’ve determined the placement of your island, trace its outline on the floor with painter’s tape or a washable marker.
Step 2: Measure For Cleats
The most secure island is attached by four cleats, one inside each corner of the cabinetry. Measure the thickness of the island’s base so that you know how far inward the cleats will need to be. Keep in mind that the island needs to fit over the cleats.
Mark the areas where the wood cleats will be positioned with a marker or painter’s tape.
Step 3: Install The Cleats
Before installing, drill pilot holes in the wood cleats. Then place them in the positions outlined in the last step. Drill pilot holes in the floor, using the holes in the cleats as a guide. Screw each cleat securely to the floor.
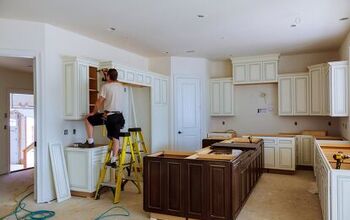
Step 4: Attach The Island
It’s now time to remove your original line or tape that indicated the position of the island. Now, the installed cleats will show you where the island is going to go. Lift the base of the island and place it over the cleats; it should fit over them snugly.
Screw the base of the island to the wooden cleats, and attach any trim or other finishing pieces on the island. That’s all there is to it–you’ve anchored your kitchen island to the floor!
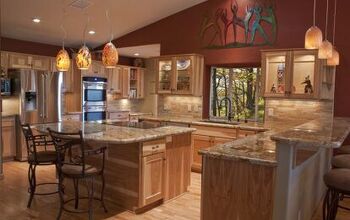
Types Of Kitchen Islands
There are many different types of kitchen islands! We’ll go over some of the most common types below.
Sink Island
A sink island features a full kitchen countertop located in the center of the kitchen. This type of island has a sink, of course. It’s a great option for those who want an extra area for washing dishes or using the sink.
Dining Island
Dining islands are a common and functional choice for many kitchens. A dining island can serve as a kitchen table. Alternatively, it can be an extra space to sit, snack, and chat. Dining islands are typically surrounded by two to four chairs.
Cooktop Island
A cooktop island is meant for cooking and serving food. This is the most complex type of island because it requires electrical work, as well as vents. A cooktop island generally features a stovetop, oven, and cooling vents.
Storage Island
A storage island is just as it sounds: a place for extra storage. It can be used for appliances, pots and pans, dishes, and other items. Oftentimes, a storage island is a smaller island on wheels that can be moved as needed.
Food Prep Island
Adding a food prep island to your kitchen is a great way to increase counter space. This type of island provides an additional area for chopping vegetables, mixing ingredients, and generally prepping food. Some food prep islands have a lower height to make it easier to apply downward force, as when kneading dough.
What Are The Benefits Of A Kitchen Island?
There are many advantages to having a kitchen island! An island can cover a large, empty floor space in the middle of your kitchen, completing a design scheme. It can function as storage for appliances or pots and pans.
An island can also be an additional area to prepare meals or to add extra seating. It’s a great place to sort through mail and handle bills as well. For those who work from home, it can even act as a makeshift desk or work area.
How Much Does A Kitchen Island Cost?
A kitchen island can be an affordable project, depending on the type of island and materials. However, it can also be pretty pricey, especially if you’re looking for an island with a sink or stovetop. In addition, using materials like granite and marble for the top of the island can quickly drive up the price.
Generally, a small rolling kitchen island with basic materials will run you about $200. Islands with cabinets and butcher block or stainless steel counters start around $600, depending on the size and materials needed. Larger islands with additional features and top-of-the-line materials can cost as much as $5000 or more.
How Tall Should A Kitchen Island Be?
The height of your kitchen island depends on what it will be used for. Food prep, cooktop, and sink islands need to be at a height that allows people to use them comfortably. Dining islands need to be 12 inches taller than the chairs or stools that go with them. With storage islands, however, you have a bit more freedom.
Food Prep, Cooktop, and Sink Islands
If you have a kitchen island meant for food prep, the standard height is 36 inches, or three feet. However, if you plan to knead dough and complete other food prep that requires downward force, 30 inches is best. The standard 36 inches is also good for the cooktop island and sink island.
Dining Island
For a dining island, 36 inches is standard. For more of a bar feel, 42 inches is perfect. Remember that the chairs or stools that accompany your dining island should be 12 inches lower than the counter.
Storage Island
For a storage island, you can choose any height that works for you. Some people like to make their storage islands the same height as their countertops. Others prefer to make the storage island a bit taller, adding even more storage space.
Do You Need to Hire Cabinet Installers?
Get free, zero-commitment quotes from pro contractors near you.
Related Questions
Are kitchen islands going out of style?
No, kitchen islands aren’t going out of style. In fact, many homeowners doing renovations choose to add islands to their kitchens nowadays. Those who are looking for a new house often include a kitchen island on their list of desired features as well.
Is a kitchen island the same height as the counter?
Kitchen islands can be the same height as the counter, but they don’t have to be. It really depends on what you plan to use the island for.
Are kitchen islands bolted to the floor?
Some kitchen islands are bolted to the floor, and others are not. Some smaller islands have wheels. Conversely, some islands are heavy enough that homeowners don’t feel the need to anchor them.

With a lifelong passion for writing plus strong enthusiasm for home improvement and DIY projects, joining the team at Upgraded Home was an easy choice. Jessica Allen likes to share helpful information with current and aspiring homeowners. Aside from writing, Jessica loves doing yoga, playing the piano, and dabbling in graphic design.
More by Jessica Allen