


How Do I Fix Uneven Grout Lines?
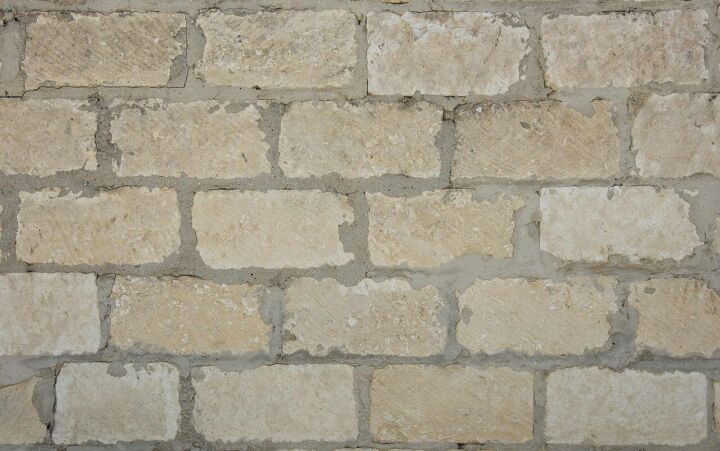
Grout is an integral part of any tiling job. It helps keep tiles straight, prevents moisture from gathering behind the tiles, and adds to the overall appeal of a room. However, if your grout lines are uneven, they’re more likely to be an eyesore than an aesthetic anchor.
Fixing uneven grout lines is simple, but you need to use some elbow grease! You can fix those pesky, crooked mistakes by utilizing a scrub brush and vinegar or a piece of sandpaper. Scrub the grout lines until they’re as even as you desire.
Do You Need Grout Replacement or Repair?
Get free, zero-commitment quotes from pro contractors near you.

Tips for Fixing Uneven Grout Lines
Whether a careless contractor left you with a mess or your DIY job didn’t turn out as planned, you need to address uneven grout lines.
There are two options to fix uneven grout lines:
- A scrub brush and vinegar
- Sandpaper
Scrub Brush and Vinegar
A thin scrub brush or toothbrush will work the best at getting into thin grout lines.
Tools You Will Need:
- A thin scrub brush or toothbrush
- Vinegar
- A plastic card
- A rag
Step 1
Dip your brush into vinegar and scrub the excess grout until you achieve the desired, even texture.
Step 2
Use a plastic card to scrape the grout lines for added precision.
Step 3
Wipe away grout and vinegar residue from the tiles with a rag.
If you do not see any difference with the scrub brush, try sandpaper.
Sandpaper
You can use sandpaper to even out grout lines; 80 grit is a good option. Be very careful with this method to avoid scratching your tiles. To avoid marking the tiles, wrap a piece of sandpaper around something thin. This tactic provides a guide to hit those thin grout lines without scraping the tiles around them.
Prepare to block out a large chunk of your day to even out your grout lines. Although the process is simple, scraping away the excess grout by hand will definitely take a while. Crank up your favorite tunes to help time fly!
Note: It is best to fix uneven grout lines no more than two days after installing tile. Grout is usually fully cured and hardens after three days. If you wait too long, removing excess grout will prove very difficult.
Common Grouting Mishaps and How to Fix Them
If you’re attempting DIY grout lines, several things can quickly go wrong.
Be aware of the following mishaps so your future self won’t have to clean up a mess:
- If you add too much water to the grout mixture, you run the risk of grout that cracks and crumbles after it’s dry. When the extra water evaporates as the grout dries, the structure of the grout deteriorates. To avoid this, add more grout powder to the mixture to balance the amount of water. If you’ve already applied the watery grout, quickly remove it and start again.
- If you wipe the grout from the tiles before it has dried, you’ll get uneven grout lines. Add a tiny amount of the grout mixture to the grout lines. Smooth until you achieve the desired even surface. To avoid this problem, wait for 15 to 30 minutes before wiping away the excess grout.
- If you’ve added too much grout between each tile, this can leave you with lumpy grout lines. Wet any large clumps in the grout with water and scrape them away. A plastic or wood scraping tool will work just fine, but avoid using anything metal. Metal will likely scratch up the tile and damage the remaining grout. Scrub the remaining grout until you achieve the desired look, then clean the grout and tile.
If you spill the grout mixture on your clothes, don’t worry! Simply scrape the grout off of the fabric with a butter knife and rinse the fabric under water. After that, wash your clothes as usual.
How to Grout Tile
Grouting tile can be tedious, but it makes for a relatively simple DIY project.
To grout your tile, you’ll need the following tools:
- Caulk
- Caulk Gun
- Trowel
- Grout Float
- Paint Brushes
- Sponges
- Cleaning Rags
- Grout
- Tile and Grout Sealer
- Bucket
Step 1
Choose your grout; there are a variety of types and colors. Choose the grout that is best for you and the area you are tiling. Home Depot suggests choosing a darker shade for high-traffic areas that tend to get dirtier faster.
Step 2
Mix the grout in a bucket. Be careful not to add too much water or the grout will crack when drying.
Note: Only make as much grout as you think you can apply in a relatively quick amount of time. If the grout sits in the bucket too long, it will start to harden and become useless.
Step 3
Pour about half a gallon of the grout on to the tile. Hold the grout float at a 45-degree angle, and spread the grout across the tile using large arcs. Make sure to press down as you spread the grout to fill the joints.
Note: You should work in three-foot by three-foot sections. Don’t try to grout the entire floor or wall all at once, or the grout will start to harden before you finish.
Step 4
Hold the grout float at a 90-degree angle to remove excess grout from the tiles.
Step 5
Wait for roughly 15 to 30 minutes for the grout to harden and wipe the tiles with a damp sponge. Be careful not to press too hard into the grout lines or you may accidentally remove the grout.
Step 6
Wipe the tiles with a damp rag to remove any remaining grout haze, then dry with a clean cloth.
Step 7
Seal the grout by applying the tile and grout sealer to the grout lines using a thin paintbrush. Let the grout lines dry for 24 hours.
Step 8
Apply caulk along the baseboards and walls to act as a flexible sealant. This step is especially important in wet places like a shower or sink area.
Related Questions
What are the different kinds of grout?
There are five different kinds of grout: unsanded, finely sanded, quarry-type, acrylic, and epoxy. Unsanded grout is best for wall tiles and joints less than ⅛ inches wide. Finely sanded grout is best for floor tiles and joints between ⅛ inch and ⅜ inches wide. Quarry-type grout uses coarser sand than finely sanded grout. It is best for tiles with ⅜ inch to ½ inch wide joints. Acrylic grout is best in wet areas because it is mildew-resistant. Epoxy grout is stain-resistant and is best for areas that stain easily, like countertops.
What is the best type of grout?
Many consider epoxy grout to be the best kind of grout. Epoxy grout is stain-resistant, durable, and doesn’t need to be sealed. For these reasons, epoxy grout is great for high-traffic areas of the home.
Can I install tile without grout?
You should always install tile with grout. Grout prevents tiles from rubbing up against each other and cracking, keeps tiles straight, and helps avoid grime buildup between tiles.
Do You Need Grout Replacement or Repair?
Get free, zero-commitment quotes from pro contractors near you.
Wrapping Up
While it’s a pain to deal with uneven grout lines, you can fix the problem easily. You just need time, elbow grease, and a scrub brush or some sandpaper. Scrubbing at the tile with a scrub brush dipped in vinegar or a thin piece of sandpaper will help achieve the desired grout line texture and appearance.
When you are installing your tiles, there are a few grout mishaps to avoid. Don’t add too much water to the mixture, and don’t wipe the grout before it has dried. Also, be careful not to apply too much grout to each joint.
Installing tile and grout is an easy DIY venture. Make sure to follow the steps provided, and your uneven grout lines will be a thing of the past!
Related Guides

Stacy Randall is a wife, mother, and freelance writer from NOLA that has always had a love for DIY projects, home organization, and making spaces beautiful. Together with her husband, she has been spending the last several years lovingly renovating her grandparent's former home, making it their own and learning a lot about life along the way.
More by Stacy Randall


![12 Washing Machine Brands to Avoid [with Recall Data]](https://cdn-fastly.upgradedhome.com/media/2023/07/31/9075781/12-washing-machine-brands-to-avoid-with-recall-data.jpg?size=350x220)


