Is Your Garage Door Crooked And Stuck? (Here's What You Can Do)
Garage doors are an appliance we have that we often forget about until it stops doing its job. They are usually so reliable that we take them for granted. If your garage door becomes stuck or crooked, address the situation immediately to prevent further damage.
If your garage door is crooked and stuck, it is most likely due to corroded cables and springs. The cables on your garage door are under tension. This tension leads to fraying and eventually complete breakage.
Do You Need a Garage Door Repair Service?
Get free, zero-commitment quotes from pro contractors near you.

Reasons Why the Garage Door Is Crooked and Stuck
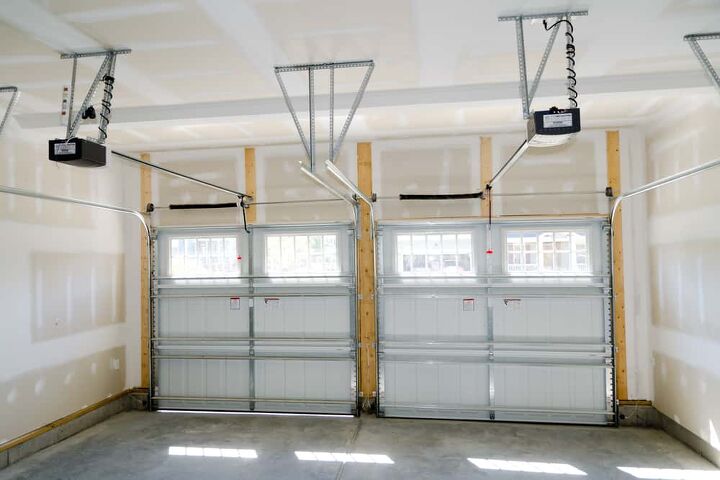
A garage door assembly is much more complicated than you might think. Each component of the garage system must work in perfect harmony to lift and lower the door. If just one part isn’t working correctly, it becomes evident immediately, such as a crooked or stuck garage door.
If your garage door is crooked and stuck, you probably have corroded cables and springs. You must replace both for the garage door to function properly. Several scenarios can lead to broken garage doors, so troubleshoot the situation before repairing.
Broken or Frozen Roller
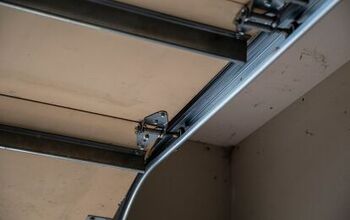
The garage door rollers are often unseen, enabling the garage door to move up and down. However, the rollers are not indestructible and can sometimes become filled with debris. This debris can become hardened and frozen.
When this happens, the roller will lag on one side of the door, causing it to hang at an angle. It is relatively easy to replace a roller, but the track can become damaged if not done promptly.
Broken or Worn Out Spring
While most believe that the opener does most of the work, the springs are what actually lift the garage door. If one of the springs is worn out or damaged, one side of the door will hang lower than the other. Therefore, you should replace the spring.
Broken Garage Door Cable
In addition to springs, cables are also part of the lifting process of the garage door. The garage door has a cable on each side that’s wound around a drum. The spring’s energy turns the drum to wind or unwind the cable, lifting or lowering the garage door.
If one of these cables becomes worn or broken, the spring won’t get to the door, causing it to be crooked. Replacing the cable is not difficult, but it does require patience to make sure the garage door is even.
How to Replace Garage Door Springs And Cables
If your garage door becomes crooked and stuck, you probably have corroded cables. You will need to repair these along with the springs to get your garage back in working order.
Safety Precautions to Keep in Mind
Before repairing your garage door, you have to take every safety precaution. Garage doors weigh hundreds of pounds, and the springs can cause serious injury. If you don’t feel comfortable replacing your garage door on your own, call a repairman.
Keep these precautions in mind when repairing your garage door:
- Make sure that the garage door opener is off.
- Manually pull the garage door closed. If you feel resistance when doing this, immediately stop.
- Use proper tools to repair the garage door. Only use the tools that the guide calls for to prevent injury.
- Have an extra set of hands at the ready in case you need help or there is an emergency.
Tools You Will Need for the Job:
- Adjustable wrench
- Clamps
- Cordless drill
- Hammer
- Leather gloves
- Locking pliers
- Rags
- Safety glasses
- Socket/ratchet set
- Winding bars
- Wrench set
- Bottom brackets
- Double-life torsion springs
- Lift cables
Step 1: Lock the Garage Door
Unplug the garage door opener before you start any repair. Clamp locking pliers or a C-clamp to the track above one of the rollers to prevent the garage door from moving.
Step 2: Loosen and Unwind the Unbroken Spring
Using a winding bar, loosen the unbroken spring. To do this, place the winding bar into the bottom hole of the winding cone. Hold the winding bar in place while you loosen the set screws. Use two winding bars to unwind the spring. The bars should be in the 12-o’clock and 9-o’clock positions.
Unwind the spring a quarter turn at a time, removing the bottom bar and placing it back with each turn. You should do this process in a leapfrogging motion.
Step 3: Disconnect the Springs from the Center Bracket
Disconnect the springs from the center bracket by removing the two nuts and bolts. The nuts and bolts are what hold the stationary spring cones to the center bracket. After detaching, slide the springs toward the end brackets.
Step 4: Secure the Torsion Tube and Remove the Old Spring
Use the locking pliers or C-clamp to hold the center bracket and torsion tube together. Loosen the set-screws on the left and right lift cable drums, then disconnect the lift cables. Start on the left side of the door and slide the torsion tube to the right. Remove the cable drum, then slide the old spring off of the tube.
Step 5: Calculate Dimensions for Replacements
First, calculate the wire diameter using a tape measure and measure the length of 20 coils, then 40 coils. Convert the measurements to decimal. Then, divide the measurements by 20 and 40 to get the diameter of the spring’s wire.
Next, determine the spring’s hand by looking at the end – is it facing right or left? If the end of the spring is pointed up on the right, it’s a right-hand wind. On the contrary, If the end is pointing up on the left, it’s a left-hand wind.
The final measurement is the inner diameter of the broken spring. Loosen the set screws and slide the damaged portion over to meet the stationary section. Measure the length of the springs, but do not include the cones.
Step 6: Reinstall the Left Spring
Reassemble the spring by sliding the new torsion spring onto the torsion tube with the cone facing the center bracket. Reinstall the cable drum with the garage door wire and insert the torsion bar into the left-side bearing bracket.
Step 7: Install the New Center Bearing
Connect the stationary cones to the center bracket. To do this, place the torsion bar to the left and slide onto the center bearing. Reinstall the drum.
Step 8: Replace the Bottom Brackets, Rollers, and Lift Cables
Replace any rusted pieces. Clamp the lift cable loop over the pin on the replacement bottom bracket and insert the replacement roller. Next, install the new bottom brackets and cables.
Step 9: Thread the Cables
Anchor the cable in the slot. To do this, run the lift cables or garage door wire vertically between the rollers and door jamb. Slide the lift cable stop through the opening on the drum.
Step 10: Tighten the Drums
Make the tension equal on each side by tightening the drums. Clamp locking pliers onto the torsion tube to lock it into place while tightening the drums. Rotate the drum to wind the cable into the grooves. Pull the cable as tight as you can, then tighten the set screws.
Leave the pliers in place and repeat the process on the other side to create equal tension on each side. This will ensure the door opens evenly.
Step 11: Wind the Tension Springs
Use a winding bar to wind the tension springs, turning the spring a quarter turn at a time. As mentioned before, leapfrog the winding bars. Use the spring manual to determine the number of turns you need to wind it.
Note: If there is no recommendation, wind 30 quarter turns for a seven-foot-tall door. Perform 36 quarter turns for an eight-foot-tall door.
Step 12: Stretch, Lubricate, and Test the Springs
After fully winding the springs, tap the winding bar to stretch the spring about ¼ inch from the center. Turn the set screws until they meet the torsion tube, then tighten the screws a one-half to three-quarters turn. Don’t tighten the screws any more than this to prevent puncture or distortion of the torsion tube.
Lubricate the spring using garage door lubricant. Slide a piece of cardboard or a paper bag between the spring and the garage wall. Thoroughly saturate the spring with the spray, then wipe off the excess.
Complete the process by removing the clamps and pliers from the torsion tube and track. Manually lift the door about three feet. If the door springs are properly adjusted, it will stay in place when you let go.
However, if the door falls when you let go, add a quarter turn to each spring until the door stays in place. If the door continues to open on its own, release a quarter-turn of the spring until it stays in place.
Do You Need a Garage Door Repair Service?
Get free, zero-commitment quotes from pro contractors near you.
Related Questions
Is a belt or chain garage door better?
Both the belt and chain garage doors have their advantages and disadvantages. Belt garage doors are typically more expensive than chain garage doors. However, the belt door has a longer lifespan than a chain garage door, lasting at least three years longer.Belt garage doors are also much smoother, quieter, and more durable than other systems. Most homeowners believe that the expense is worth it in the long-run based on lifespan and durability.
What is the average price of a standard garage door?
The price of the garage door will depend on the type of garage you prefer. Single garage doors range from $600 to $1,500. A double car garage can range from $800 to $1,500. These prices include labor costs, which run about $300 per unit. If you’re on the fence about adding a garage door, it can increase the value of your home. Depending on the style, it can increase the selling price by up to four percent.

Stacy Randall is a wife, mother, and freelance writer from NOLA that has always had a love for DIY projects, home organization, and making spaces beautiful. Together with her husband, she has been spending the last several years lovingly renovating her grandparent's former home, making it their own and learning a lot about life along the way.
More by Stacy Randall


![10 Best Electric Pressure Washers – [2022 Reviews & Guide]](https://cdn-fastly.upgradedhome.com/media/2023/07/31/9070600/10-best-electric-pressure-washers-2022-reviews-guide.jpg?size=350x220)