


Everything About Gambrel Roofs (Types, Advantages & More)
The type of roof your home has can be a unique architectural feature that sets it apart from other houses in the area. Some roof structures can even significantly increase property value. With that said, whether you’re updating your existing roof or looking for a new design, it is very beneficially to opt for a structure that is appealing.
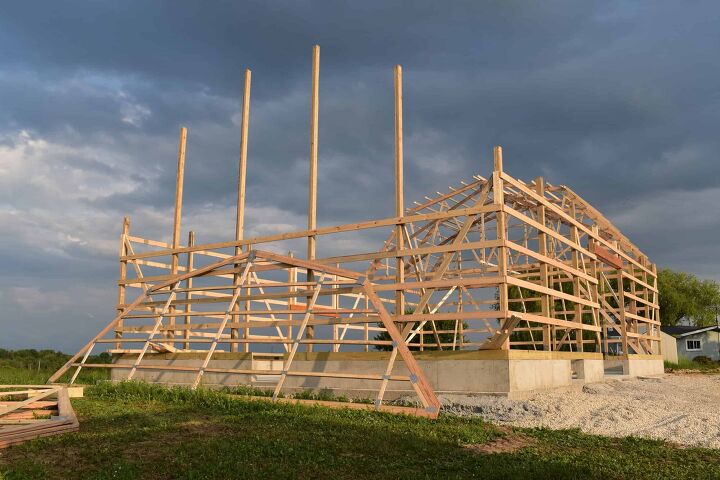
A gambrel roof, also known as a “Dutch roof,” is a two-sided gable roof with symmetrical slopes on either side with its highest peak averaging at a 30-degree angle. The different types include the classic, mansard, and wall-support gambrel roofs. They provide excellent drainage, lots of space, and are cost-effective to build but require maintenance.
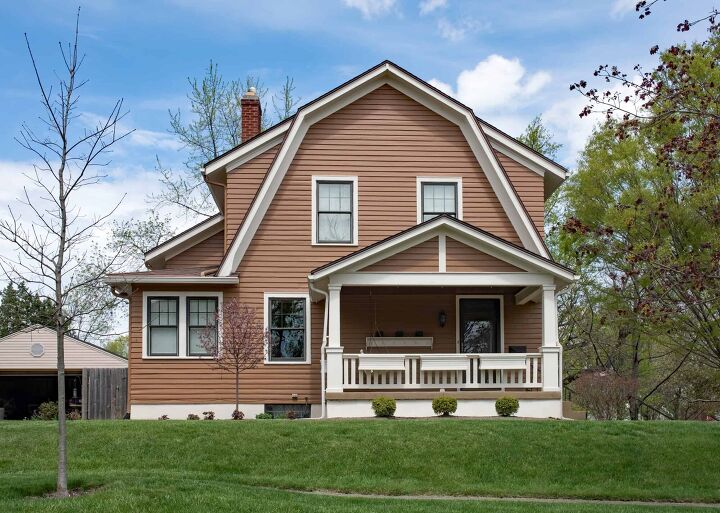
Often seen as the stereotypical roof on farm houses, barns, sheds, and log cabins, a gambrel roof can offer additional floor space and a nostalgic appearance. However, these types of roofs aren’t just for these types of structures. In fact, gambrel roofs are gaining popularity among homeowners who seek a bigger and more functional attic space.
In this guide on gambrel roofs, we will explore every aspect of this roof design including its history, the advantages and disadvantages, and how to build a DIY gambrel roof for your property.
Do You Need Roofing, Siding, or Gutter Installers?
Get free, zero-commitment quotes from pro contractors near you.

What is a Gambrel Roof?
A gambrel roof is essentially a type of symmetrical two-sided gable roof that has two slopes on either side. The upper slope is positioned at a shallow angle, while the lower slope is much steeper – almost vertical. A gambrel roof’s peak is typically constructed at a 30-degree angle and the second slope is usually 60 degrees.
However, these roofs can be customized to the individual desires of the builder or homeowner. The design of a gambrel roof offers the benefits of a sloped roof while reducing what would otherwise be a tall roof and maximizing usable space in the building’s upper level.
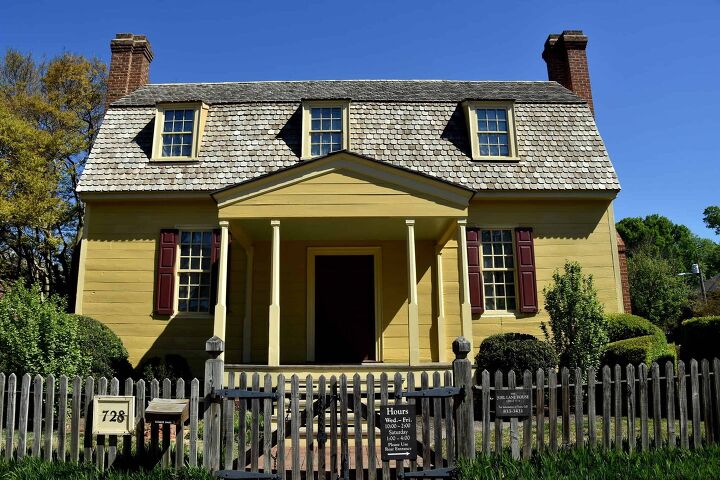
When used on homes or residential buildings, gambrel roofs most often include double-hung windows, for extra natural light, and a dormer. A dormer is an additional space that protrudes out from the building with its own roof parallel to the larger roof.
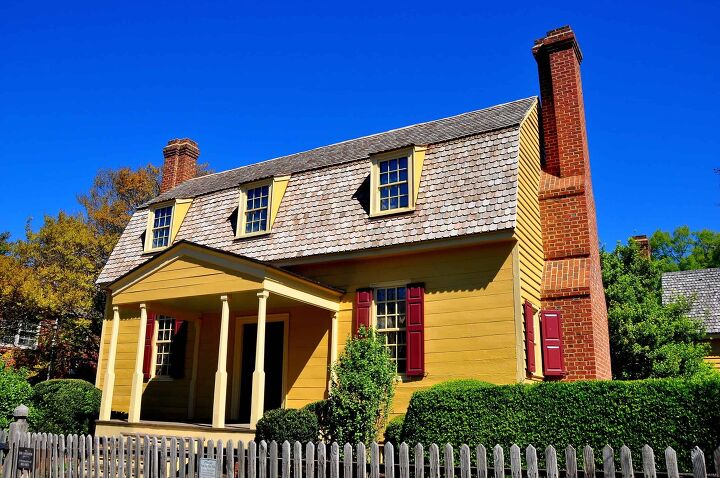
Gambrel roofs are a standard design for Dutch colonial homes, and was made popular in the 18th century in North America. The roof structure of barns are probably the most notable examples of gambrel roofs.
A Brief History of Gambrel Roofs
The word “gambrel” is Norman English and has many different spellings, including “gambol” which can be found in the Boston carpenters’ price book from 1774. It refers to a wooden bar that is used by butchers to hang the bodies of slaughtered animals.
When in use, a butcher’s gambrel, which was later constructed out of metal, resembled the two-sloped design of a gambrel roof. Hence, the reason for the designation as a “gambrel roof.” With that said, the origin of gambrel roofs in North America is generally unknown. However, the oldest gambrel roof in American can be found at Harvard University – The second Harvard Hall built in 1677. Arguably, the oldest surviving home in the United States with a gambrel roof is the Peter Tufts House, a Colonial American home in Massachusetts, circa 1677-1678.
The gambrel roof style is very common across Georgia, Maine, and even more so in Coastal regions across the country. It was popularized in North American during the 18th century, and was also referred to as a “Dutch roof” during this time. Some historians believe that early Dutch traders in Southeast Asia saw the style and brought it with them to other places they traveled to.
Some view this roof design as modest, however, there is no denying its ability to survive several thousands of years of home styles. While the original gambrels provided more living spaces on a third story, modern versions are typically more popular due to their visual interest.
Advantages of Gambrel Roofs
With so many roof types to choose from, it can be overwhelming to decide between gambrel, mansard, gable, hip, skillion, and more. If you’re considering opting for a gambrel design, we’ve assembled a list of some of the advantages you can expect to enjoy from your new roof.
- A classic, traditional look. Since gambrel roofs are most commonly seen on farmhouses, Georgian-style homes and Dutch Colonials, choosing this type of roof can give your home that distinct sense of heritage. Even if your roof is installed on a new construction, the aesthetic appeal can offer more value to your property. Even though the style is relatively simple, it gives off a certain romanticism – something you cannot easily achieve with flat roofs or another more modern design.
- Provides excellent drainage. Due to the steep slope of gambrel roofs, the design offers a great drainage profile in the case of heavy precipitation. Large amounts of rainfall are easily handled by simply flowing off the side of the building. As a result, there’s reduced risk of sitting water, leaks, and flooding. A gambrel roof even reduces the need for gutters or another type of rainwater dispersal method.
- Simple construction. Although gambrel roofs may appear complex, they are relatively easy to build. The option of a gambrel roof works great where a higher ceiling or more space is needed or desired. There are no complex joints or valleys that need to fit together and the framing is simple. Most use two beams with gusset joints to form the structure of a gambrel roof, making the job faster and easier for contractors to complete.
- A cost-effective roof design. Due to the simple construction, the gambrel roof is a cost-effective option. It can be constructed relatively easy by your building, which keeps labor costs considerably low. The structure also takes less material to make, which also lowers the cost of gambrel roof.
- Extra space. The main reason why storage buildings and outdoor sheds use gambrel roofs is for the extra interior space. A gambrel roof allows you to have a limited footprint on your property while occupying the same amount of space to store all your stuff. The lower slope offers plenty of headspace, which many homeowners find desirable for use as a functional attic space. Dormer windows can add even more space, which are found on many gambrel roofs.
- A long-lasting result. When a contractor uses the correct materials and builds it properly, a gambrel roof can last you for several decades. So long as you perform regular maintenance, you can even expect your gambrel roof to last well over a century without needing to be completely refurbished.
In short, with a gambrel roof, you can have a desirable structure that looks wonderful, offers extra storage space, is easy to build, and provides great drainage – all without breaking your budget.
Disadvantages of Gambrel Roofs
Like anything, gambrel roofs do have some drawbacks to them. In order to attain a proper analysis and decide if this type of roof is the best choice for you, we must also examine the disadvantages of gambrel roofs.
- Poor protection against inclement weather. Although the sloped design of a gambrel roof does wonders for rainfall, the flatter upper slope tends to accumulate snow. As a result, the immense pressure of heavy snowfall may cause the roof to collapse over time. Unless you have a way to remove the snow from your roof, you may want to consider a different option if you live in an area that experiences a lot of snow. Gambrels are also not suitable for areas with high wind, which can uproot the roof if it isn’t engineered properly.
- Uneven wear due to weathering patterns. Over time, it is highly likely that gambrel roofs will weather. To ensure durability and stability, they must undergo yearly inspections and maintenance. If significant damage occurs as a result of weathering patterns, it may be pricey to keep up with the cost of this design. However, contractors can reduce uneven wear by installing metal or other sturdy materials that reinforce the trusses.
- More maintenance required. As previously stated, gambrels tend to require frequent maintenance. To ensure that no damage has occurred to the structure due to extreme weather, annual inspections must occur.
- Some designs have ventilation issues. Since most structures with gambrel roofs use the open area as a functional space, there may be some ventilation concerns that arise. The top of your structure will inherently have less insulation, meaning hot, moist air inside your home will rise. You also must factor in outside precipitation that tries to get in. Fortunately, most of the time, ventilation fans and other options can help to counter this disadvantage.
- Retrofitting is a challenge. Although building a gambrel roof as a new construction is relatively easy, installing one on an existing building can be rather expensive. The unique shape tends to be difficult to install if support structures do not already exist. As a result, gambrel roofs are generally not the ideal option for someone who wants to upgrade their current home. You’ll have to gut the entire upper section of your roof’s rafters to create the correct shape.
Buildings that use the gambrel design usually require an extra level of attention to ensure that no issues are developing that would require maintenance. With that said, gambrel roofs work best in climates that have temperate weather and don’t experience any precipitation extremes.
Types of Gambrel Roof Designs
Depending on personal desires and specifications, the actual design of a gambrel roof can differ widely. However, they can often be broken down into three common types:
1. The Classic Gambrel Roof
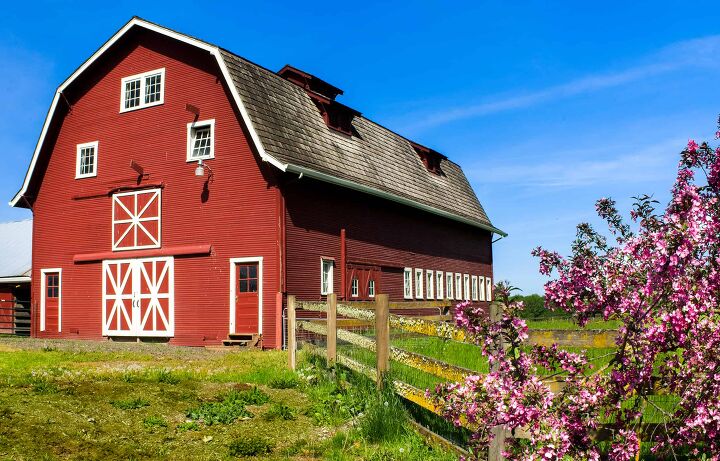
The classic gambrel is the most popular type of gambrel roof out there. It is most often seen as the roof on sheds, barns, and other farming structures. Its’ two-pitch design offers a major advantage, allowing homeowners to maximize attic space and use it as a functional additional floor for storage or as a loft.
2. Mansard Roof

Similar to a gambrel roof, the Mansard is a French style roof. It has a nearly identical shape, but with four sides instead of two. Like the gambrel, Mansard roofs have a lower slope that is much steeper than the upper. The lower slope of Mansard roofs is punctured by dormer windows
3. The Wall-Support Gambrel
The wall-supported gambrel design is one of the visually appealing types of gambrels. As opposed to having ridge boards installed, the lowest point of the pitch on wall-supported gambrels overhang the eaves of the house. As a result, the storage space is slightly lessened with this option. The wall-supported style is typically used on storage sheds, as there is no need for the installation of soffits.
Gambrel Roof Construction
Initially, a gambrel roof is framed out. This means that the builder will construct a series of individual trusses, all with identical measurements. These trusses can be achieved by using wooden two by four boards that are either assembled on the ground or another flat surface.
On a gambrel roof, each side of the roof truss has two roof beams, which are reinforced using a gusset place. A gusset plate is simply a metal or wooden plate that helps to strengthen the joint, and is generally screwed in to secure. Once all of the trusses are built, they are raised into position on top of the structure. Then, they are secured to the floor.
Afterwards, the trusses are covered with the deck of the roof, which can be made of shingles, wood, or metal siding. The number of trusses that are required depends entirely on the size of the building and the size of the roof being built.
How to Build a Gambrel Roof
To construct a gambrel roof as a DIY project, you first must draw up plans that’ll help you determine the proper dimensions. When you have the plans, you can simply cut and build the rafters and raise them onto your structure. Follow the steps outlined below to build your own gambrel roof:
Step One: Cutting the Boards for the Rafters
Once you’ve developed a plan for your gambrel roof, you’ll need to buy some 2×4 boards to assemble your rafters. To determine how many boards you need, count your wall studs. You need one full rafter piece for each wall stud and each rafter piece is going to consist of 4 2×4 boards that are 4 feet long.
With that said, if you have 5 wall studs, you’re going to need 5 full rafters. Since you need 4 boards per rafter, that means you’ll need to buy a total of 20 boards. However, you’ll want to get extra boards just in case!
Once you have your boards, mark both ends of each at a 22.5 angle and cut along those lines. You can use either a circular saw or a miter saw. When you’re done cutting, all of the board ends should sit flush against each other.
Step Two: Assembling the Rafters
Using a piece of 10 feet by 5 feet plywood as the dimensions of your roof, start to assemble the rafter pieces. Place them flat onto the piece of plywood so that they are lined up with all the ends flush. This is how the rafters should appear when installed on your shed.
Then, to help you connect rafter pieces together, you can install wood blocks on either side which will keep them in place. The next step is to create the gussets, which are used to reinforce the joints. This can be achieved by nailing 1.5 inches of plywood at all the joints. Repeat this process for the remaining rafters.
Do You Need Roofing, Siding, or Gutter Installers?
Get free, zero-commitment quotes from pro contractors near you.
Step Three: Raising the Rafters onto the Structure
The final step is to hoist the rafters onto the top of your structure. You may want to enlist the help of some friends for this stage in the process. Raise the rafters into position so that they line up flush with the wall studs.
Then, place a metal plate between the rafter and the top of the wall. Drive nails through the board at an angle that goes through both the rafter board and the top of the wall. A joint place should be installed on each side of the rafter boards. Continue installing a rafter for each wall stud.
Last but not least, measure and cut 4 total pieces of plywood or thick OSB. These will be your roof sheeting and should be the width of each piece of rafter and roughly half the length of the structure. Starting at the top corners, nail the sheeting into place.
Related Guide

Jessica considers herself a home improvement and design enthusiast. She grew up surrounded by constant home improvement projects and owes most of what she knows to helping her dad renovate her childhood home. Being a Los Angeles resident, Jessica spends a lot of her time looking for her next DIY project and sharing her love for home design.
More by Jessica Stone


![10 Best Electric Pressure Washers – [2022 Reviews & Guide]](https://cdn-fastly.upgradedhome.com/media/2023/07/31/9070600/10-best-electric-pressure-washers-2022-reviews-guide.jpg?size=350x220)


![How Much Weight Can a 4×4 Support Horizontally? [It Depends!]](https://cdn-fastly.upgradedhome.com/media/2023/07/31/9070333/how-much-weight-can-a-44-support-horizontally-it-depends.jpg?size=350x220)


![How To Reset A Whirlpool Cabrio Washer [In 5 Easy Steps!]](https://cdn-fastly.upgradedhome.com/media/2023/07/31/9076531/how-to-reset-a-whirlpool-cabrio-washer-in-5-easy-steps.jpg?size=350x220)


