Do Electric Ovens Need To Be Hardwired? (Find Out Now!)

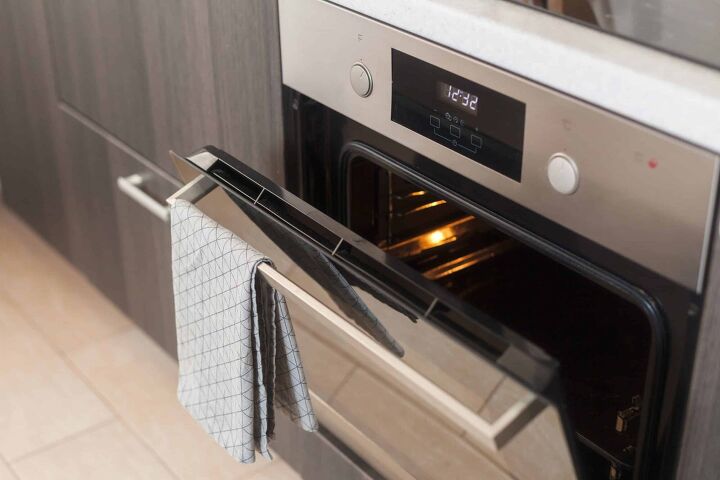
While most of the electric ovens that we are familiar with simply plug into the wall, not all electric units are created equally. From time to time, you may notice that a unit has the capability to be hardwired into place.
If an electric oven needs to be hardwired highly depends on the rating of the oven. There are some ovens that can be plugged in while others will need a fused connection. If your oven is over 3kw in power, then it will need hardwring. If it’s under 3kw, it can be plugged in.
Do You Need to Hire an Electrician?
Get free, zero-commitment quotes from pro contractors near you.

How to Know if an Electric Oven Needs to be Hardwired
If you have ever wondered why there are some electric ovens that simply plug in and why there are others that need to be hardwired, the answer is pretty simple. It all depends on the power rating of the oven.
If the oven is over 3kw in power, it has to be hardwired into an appropriate circuit. If it is under 3kw of power, it certainly can be plug in. Keep in mind, however, that the preferred method is to hardwire it via a 13-amp fused connection unit.
How to Hardwire Your Electric Oven
After checking to make sure that your electric oven needs to be hardwired, now comes the step of actually doing so. They need to be hardwired in some instances because they generate a tremendous amount of heat.
In order to generate that heat, they need the proper power source. Since a separate fuse is needed for the appliance, you will also have to fit your electric oven onto a separate circuit. The reason for the isolation is to ensure that your electric oven is getting the proper amount of energy at all times and that it remains safe to use.
Step 1: Double Isolating Switch
After you’ve determined that the power source for your electric oven requires a hardwiring, you will need to make sure that the power source is being “supervised”. To do this, you will need to buy and install double pole isolating switches.
These are the type of switches that, in the event of a short circuit, will ensure that the wiring of the electric oven isn’t carrying an electrical current anymore. The purpose of this is to ensure that you won’t get an unexpected shock.
You can buy single switches, but those will only de-energize the live wire. The problem here is that electric ovens use so much power that even the neutral wire can become energized. With double pole switches, even the neutral wires will be shut off to ensure maximum safety.
Step 2: Know Your Control Unit Positioning
The electric oven needs to be connected using a thick cable; this is known as the control unit. But it is important to make sure that the unit is positioned within 6 feet or so of the unit but never directly below the electric oven as this could create a potential fire hazard.
If you have a newer electric stone, there’s a pretty good chance that they will have neon lights installed. These are to signify when the electric stove is on and to provide an indication as to whether or not there is an electrical current flowing within.
Step 3: Pick the Right Cable
With most new electric ovens, there should be a cable that comes included with the packaging. But if you happen to notice that there are no cables within, there are some basic guidelines to assist in choosing the right one.
First is that you need a cable that has the proper thickness level. For most domestic uses, you’ll want a 2.5mm cable that is heat-resistant (for obvious reasons). That cable also needs to have several wires to it.
Generally speaking, you’ll find them with 3 wires built-in. One is blue to indicate neutral currents, one is brown to indicate the live current, and one is exposed and is meant to take the residual current down into the Earth. The latter cable is typically named either “twin and earth” or “2 core and earth” for easy recognition.
Step 4: Know Your “Hot Zone”
It is important to know the hot zone of your electric oven. This is generally the area that is located right above the appliance. Before you install the electric oven where you want it to go, make sure that it is nowhere near any potentially flammable materials like wallpaper, wood, or an overhanging boiler.
Not only that, but there should be a gap of at least a foot between the appliance and any other installed items in your kitchen. This includes kitchen fitting, fridge-freezer installations, mounting sinks, or a dishwasher fitting. The only thing that can be within that foot range is countertops; everything else needs to stay a respectable distance away from the electric oven.
Step 5: Connect to the Power Grid
Since we know all of the requirements have taken all of the safety precautions, it is now time to do the deed. You’ll need to connect your cable to the back of your electric oven. Find the terminal outlet box (on the back of the oven) and unscrew the plate.
Connect your neutral, live, and earth wires into their appropriate slot. This should be neutral to the left, live to the right, and earth in the middle. Secure the wires into place by tightening the screws and then reapply the plate back over top.
Step 6: Connect the Oven to the Control Unit
Make sure that the cable is properly secured to your appliance and then lock the oven circuit into the fuse box. You’ll do this using a small padlock to prevent any accidental flipping of the switch when you are doing the wiring.
Turn on the double pole isolator switch to remove all of the energy from the electric oven. Use a scrap piece of vinyl or some other protective covering underneath your oven to prevent any scratching when you move the unit.
Using a voltage checker ensures that the unit is totally dead and therefore safe to work with before removing any of the screws on the inside connections. From there, carefully push each of the wires into the corresponding slots, returning the screws back into place after you have done so.
Make sure that you do not cross-thread any of the screws because they will not sit securely into place. This is done when you screw at an angle; it will not properly sit in this case. Lastly, screw the insulation bit under your wiring to make sure that the wiring sits firmly into place.
Do You Need to Hire an Electrician?
Get free, zero-commitment quotes from pro contractors near you.

Do You Need a Special Plug for an Electric Stove?
Because electric stoves use so much energy, you can’t just plug them into any socket. Most stoves will require a special 220-volt outlet to handle them; the standard 110-volt outlets that you would see in your home are simply not fit to hold up to that kind of power.
Whenever dealing with an electric stove, make sure to follow the manual’s guidelines. They will dictate specific power requirements as well as safety measures that need to be put into place to prevent injury or death from electrical shock.

Ryan Womeldorf has more than a decade of experience writing. He loves to blog about construction, plumbing, and other home topics. Ryan also loves hockey and a lifelong Buffalo sports fan.
More by Ryan Womeldorf






![10 Most Dangerous Neighborhoods in Baltimore [Updated]](https://cdn-fastly.upgradedhome.com/media/2023/07/31/9075655/10-most-dangerous-neighborhoods-in-baltimore-updated.jpg?size=350x220)
