How To Cut A 45-Degree Angle With A Hand Saw (Quickly & Easily!)

Television home renovation shows have exploded in popularity, giving amateur builders increased confidence for attempting small home projects. A growing number of do-it-yourself weekend warriors are getting their thrills installing interior trim and building small furniture. However, the goal is to make clean cuts and angles–which is not always easy for beginners to pull off.
Many home workshops have all the latest power tools, with power saws being the most prevalent for cutting raw materials. They’re great for quick, smooth cuts and angles but are not the only method for sawing solid building materials. With a few simple tools, especially those with straight measuring edges, and careful measuring, you can just as easily cut them with a hand saw.
Beginners tend to lean toward power tools for greater accuracy because who wants a sloppy, uneven cut? Very few people realize there are lots of tips, tricks, and techniques that produce the same quality with hand tools. Learning and practicing these tips builds construction and artisan skills that open up multiple building options.
Do You Need Handyman Services?
Get free, zero-commitment quotes from pro contractors near you.

Know Your Materials
Most projects involving cut angles use solid wood or wood products such as plywood or medium-density fiberboard (MDF). There are hardwoods and softwoods in various sizes and thicknesses used in small crafts and big building construction. Besides wood, you can also use PVC pipe, steel, and aluminum for different home projects that might require angle cutting.
The types of material used dictate which cutting tool to use and what technique will yield the best results. Some saws can cut just about anything, while others may serve particular functions and specific materials. It’s good to know the best match of tools and materials when starting a project.
Know Your Cutting Tools
Once you have your materials and project plans lined up, you have to select the proper tools. There are 14 different types of manual saws ranging from general use to specialized function. The rip cut (hand) saw and the hacksaw are the most commonly used for general tasks.
Also, there are differences in the saw teeth that may affect your project’s outcome. Angle cuts typically serve projects that join at the corners, like baseboards and crown moulding. Smooth edges make the most seamless connection, so you won’t want to use a saw that leaves rough edges.
Know Your Helper Tools
Now that you have a cutting instrument and something to cut, there are some extra items to assist your process. Measuring tools help you ensure clean, accurate cuts and professional-looking projects. A good work surface where you can place your materials, plus clamps to hold things steady, are also helpful.
Two widely used measuring devices for marking angles are measuring squares and protractors. You’ll need to do a little calculating, but you can use your measuring tool to quickly mark your cutting point. A miter box has the angles pre-notched, so it’s easier to mark, clamp and cut your material.
A pen, pencil, or marker is ideal for marking cut points, or you can score it with your cutting saw. Workbenches and clamps help you to hold the material in place so your cuts won’t be crooked.
Tools You Need for the Job
The specific tools needed will greatly depend on the material you’re cutting. But these are the basic items you’ll need to hand cut a 45-degree angle:
- Saw
- Workbench or other elevated flat surface
- Pencil, pen, or marker
- Straight measuring edge (measuring square, protractor, miter box, small scrap of wood plank)
- Clamp
- Corner clamp
Before You Get Started
The key to cutting any material is making sure your saw blades are in good working condition. Make sure the teeth are sharp, and the blade is relatively clean to make the smoothest cuts. Also, be sure to have the correct saw for whatever material you’re using.
Check whether your marking implement is working–dry ink tips and broken pencil leads can be frustrating. Carefully measure and mark your cut points and double-check your measurement before cutting: “measure twice, cut once.”
Most importantly, it’s good practice to have a safe work environment when working with saws. Be sure to follow safety precautions when using the saw to avoid injury. Keep fingers away from the blade’s path and support the material with a firm grip.
Proper Sawing Technique
One of the frustrations with new handypeople is having to put so much muscle into using hand tools. Contrary to how it might feel, people created tools to make work easier, not harder. You can use a hand saw without needing brute strength by using some easy techniques.
Keep your entire arm aligned with the saw: hand and wrist parallel on the handle, arm at a right angle. Push force forward into the saw instead of trying to pull it back towards you. Use even, downward strokes when cutting–either in a straight line or a forward oscillating curve.
Use the entire length of the saw blade to cut your material. Short, uneven strokes create more work while increasing the likelihood of a jagged, crooked job. Adjust your cutting angle once you’re nearly through the plank and hold the discard piece firmly to prevent cracking.
The Basics of Sawing Wood Planks, Baseboard, and Moulding
To prep your board lay it directly on your cutting surface. From here, you’ll need to find where you want to position your 45-degree mark. Once you’ve marked the wood, hold it securely and saw along the guideline.
Be mindful of keeping your fingers away from the saw’s teeth and holding the blade steady. Your cuts should join smoothly; if they don’t, secure planks in the corner clamp and trim the edges.
Measure and Mark Your Angles
These are some of the different measuring methods when cutting wood with a hand saw:
- If using a miter box, line up your saw with the 45-degree mark on the box.
- When using a square, align it with your board’s long edge, marking a line with a pen or pencil.
- If using scrap wood, lay the scrap piece vertically on your plank where you want to mark the angle. Make a small mark at one top corner and one bottom corner of the scrap, then connect with a straight edge. Be sure your scrap piece is the same width as the plank you are cutting.
- If you are brave enough to trust your eyesight, you can use the saw blade to find the angle. Simply hold it against the plank and move it until the reflection looks like a 90 degree joined corner. Lightly score the plank to make a groove to mark your angle.
Sawing PVC Pipe
A hacksaw is the best option for cutting a PVC pipe, but a standard hand saw works as well. Carefully mark your angle with a measuring square–it’s a bit trickier on a curved surface, but not impossible. You’ll definitely need to clamp your pipe to make a smooth, straight cut.
Whatever tool you choose, the pipe will be jagged with rough burrs around the cut edge. To achieve a clean fit, you’ll need a flat blunt edge to knock the burrs off. A butter knife or metal putty knife should do the trick.
Sawing Metal and Angled Trim
Occasionally, you may need to tackle a project involving steel or aluminum edging. These lightweight metals are easy to trim but take a little more effort and caution to do cleanly and safely. The best manual saw for this job is a hacksaw, though tin snips are useful with softer metals.
Protective gear and clothing are wise choices when using a saw, and especially when working with metal. Make some one-way strokes on the clamped metal in reverse to create a guide groove to cut along. Slow, smooth, and steady movements provoke the least friction; some lubricating fluid on the blades helps the process even more.
Pro Tips
Here are a few additional tips to enhance your project construction process:
- For carpentry and woodworking, find boards that are suitable for your project. Softwoods are not recommended for durable, weight-bearing projects or items due for heavy, regular use.
- Plan your cuts and allow for ten percent overage on the length you will need.
- The hand saw’s handle has a hidden function as a measuring square. You can lay the handle base against your material to measure and mark 45 and 90-degree angles.
Do You Need Handyman Services?
Get free, zero-commitment quotes from pro contractors near you.

Related Questions
What is the difference between woodworking and carpentry?
The terms carpentry and woodworking are often used interchangeably, but there are subtle differences between the two. Both involve the labor of cutting and joining timber as a trade. Carpentry refers more to wood construction of buildings and structures, whereas woodworking focuses on cabinetry, crafts, and smaller projects.
Can you buy custom-cut lumber at a hardware store?
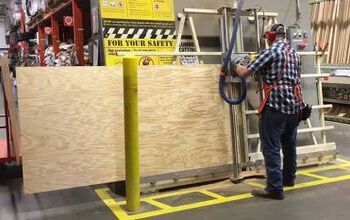
On occasion, you may need a specific measure cut that isn’t the regularly stocked pre-cut planks or bulk lumber. Customers may not have the proper tools or confidence to cut it themselves. Fortunately, hardware chains like Home Depot and Lowe’s will cut pieces to order at customer request.
What is the difference between a bevel edge and a miter edge?
Both bevel and miter edges are angled cuts at the end of planks, molding, or trim. You cut bevel edges along the face of the material, and pieces join forward-facing. Miter edges are cut along the square side of the material and join horizontally at their ends.

Stacy Randall is a wife, mother, and freelance writer from NOLA that has always had a love for DIY projects, home organization, and making spaces beautiful. Together with her husband, she has been spending the last several years lovingly renovating her grandparent's former home, making it their own and learning a lot about life along the way.
More by Stacy Randall


