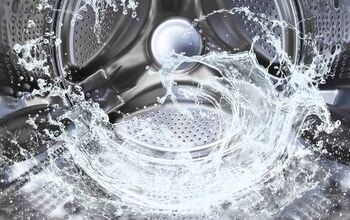
How Much Does It Cost To Replace The Bearings In A Washing Machine?

Bearings are responsible for your washing machine running smoothly. Unfortunately, after years of heavy use, the bearings in your washing machine will eventually give out. Luckily, you can forego having to replace your washing machine and instead replace the bearings.
The average cost to replace washing machine bearings is $175, and that includes parts and labor. It is worth it to replace bearings because it costs $1,125 to buy and install a new washing machine. You could possibly even save more if you buy the bearings and do the job yourself.
Because a brand new washing machine can cost $250-$2000 or more, replacing the bearings is cheaper than replacing the machine. You can find the bearings themselves for $100 or even less.
If you know how to replace the bearings, you can save up to $100 on labor alone. Let’s get into what role bearings play in your washer and what the cost of replacing them consists of.
Related Guide: Do I Need To Replace Washing Machine Bearings?
Do You Need Appliance Installation or Replacement?
Get free, zero-commitment quotes from pro contractors near you.

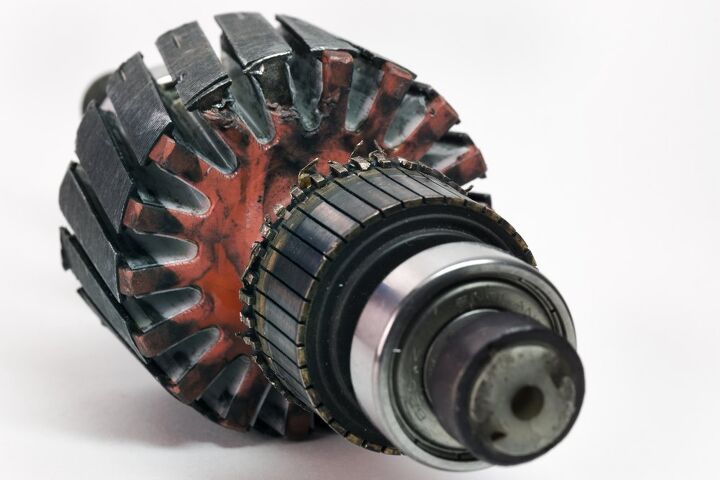
What Do The Washing Machine Bearings Do?
The bearings in your washing machine help to ensure that the washer’s drum spins efficiently while handling a load. Bearings help keep the noise of a spin or wash cycle down.
One of the key roles of bearings is also to help keep a seal and prevent leaking. Some of the ways that you’ll know it is time to replace your washing machine’s bearings include:
- Excess noise while running a load of laundry
- Water sporadically leaking out
- Movement and rattling in the washing machine drum
If your washer’s bearings go bad, your washer’s cycles won’t run smoothly, and you’ll notice the loud operation easily.
How Much Do Replacement Bearings For A Washer Cost?
For a full set of washing machine bearings, it will usually cost between $60 and $110. A full set of replacement bearings includes three bearings.
Some sets, such as Whirlpool’s Tub Seal and Bearing Kit for $90.89 come with adhesive to help install the new bearings. Other sets, like the Maytag Cabrio Bravo Bearing and Seal Kit for $64.95 come with tools as well as adhesive.
You can find individual bearings online as well, but the value is not as high. Some single washer tub bearings can cost as much as $40. Compared to the value of the above Maytag and Whirlpool offerings, choosing a bearings and seal set is a better deal than single bearings.
Is It Worth Replacing The Bearings On My Washer?
That depends entirely on how long you’ve had the washing machine and how well it is running. If, for example, you are hiring someone to replace the bearings, it could cost up to $200.
If you have had your washing machine for upwards of 10 years and it is not running so well, it may be worth replacing. New washing machines cost anywhere from $250 to $2000.
Needing new bearings alone is not enough to justify replacing your washing machine, however. Only replace the washer itself if you have gotten plenty of years out of it and it doesn’t perform as well as it used to.
Additional Considerations
Otherwise, it is well worth spending the $150-$200 it would cost to have your bearings replaced. It’s an even better deal if you know how to replace the bearings yourself.
If you can replace the bearings yourself, you would only need to spend roughly $100, possibly less, on a bearings kit. Replacing bearings can be time-consuming if you have never done it, however.
To be safe, consider spending the extra $100 to have a professional replace the bearings in your washing machine for you.
How To Replace The Bearings In Your Washing Machine
Replacing the bearings in your washing machine is not difficult, but there are steps that need to be followed to do it correctly. Follow these steps and take your time as to not do any damage to your washer while replacing the bearings.
Before you can start the process, however, you must shut off the power to your washing machine. Now you can get started. The guide below uses a front load washing machine as an example.
Step 1: Carefully Remove The Washer Drum Lid
The top lid and panel need to come off of the washer before you can get to work. Most washer’s top lids are held in place by screws. Use a screwdriver to remove the screws, then set them aside for later.
Now, remove the control panel. The control panel is the part of the washer that you use to set and start all of your cycles. Like the lid, the control panel is anchored down by screws. Remove the screws and carefully lift the panel off of the machine.
Step 2: Remove The Emergency Drain Hose And Kick Plate
The kick plate is the panel at the very bottom of the washing machine not much taller than your foot is. You will need to remove it before removing the emergency drain hose.
Removing a kick plate is as easy as pulling it off of the machine. Once you have the removed the kick plate, you can remove the emergency drain hose. You can easily unscrew the hose with a flat head screwdriver.
Pull the hose out of the housing. The hose may be locked in with a spring clamp. If so, use a tool like a pair of pliers to slide the clamp back. Then, the emergency drain hose should easily come out.
Step 3: Take Out Front Load Panel
Now, you can get rid of the front load panel. There is a seal in the doorway of a front load washer panel. Remove the seal and unscrew the interlock holding the door in place.
Step 4: Take Out Sump And Heating Element
All you need to do is remove the seal holding the heating element in place. Then, it can be removed by hand. The sump clamp attached to the tub is held in place by one screw usually. Remove it.
Step 5: Remove The Components
The back panel comes off just like the front panel. For the motor, unscrew the bolts and it will come out easily. Your washer’s pressure chamber comes out by undoing the clip holding it in place.
Step 6: Remove The Washer Drum
The washer’s drum is held in place by screws and tabs. Remove them and the drum will come loose. Slide the drum forward and look for the bearings.
You’ll see them at the back of the drum. Remove the old bearings by knocking them out with a blunt tool (chisel/wrench).
Step 7: Attach New Bearings
Put new bearing seals over the old one you chiseled out. Place the new bearings on the seal and use adhesive to secure it. Repeat with all 3 bearings.
Step 8: Reassemble The Washer
Put the washer back together using all of the pieces you removed.
Do You Need Appliance Installation or Replacement?
Get free, zero-commitment quotes from pro contractors near you.
What Did We Learn?
Replacing your bearings only costs $200 if you hire outside help. If you replace your bearings on your own, it can cost up to $100 and you’ll save money on labor.
It takes a lot of work to replace bearings on your own, so if you have no experience doing so, consider enlisting help. Otherwise, be careful and keep track of all of the little parts in your washing machine. Good luck!
Nick Durante is a professional writer with a primary focus on home improvement. When he is not writing about home improvement or taking on projects around the house, he likes to read and create art. He is always looking towards the newest trends in home improvement.
More by Nick Durante