


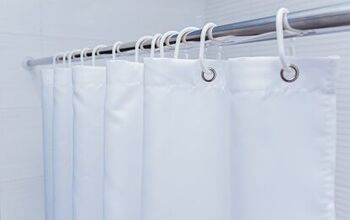
Can You Tile Over Drywall In A Shower? (Find Out Now!)
Tiles look great in the bathroom. When you’re looking to remodel your bathroom, one of the questions that will cross your mind is whether tiles can be installed over drywall in the shower. Depending on who you ask, you’ll get different answers to this question.
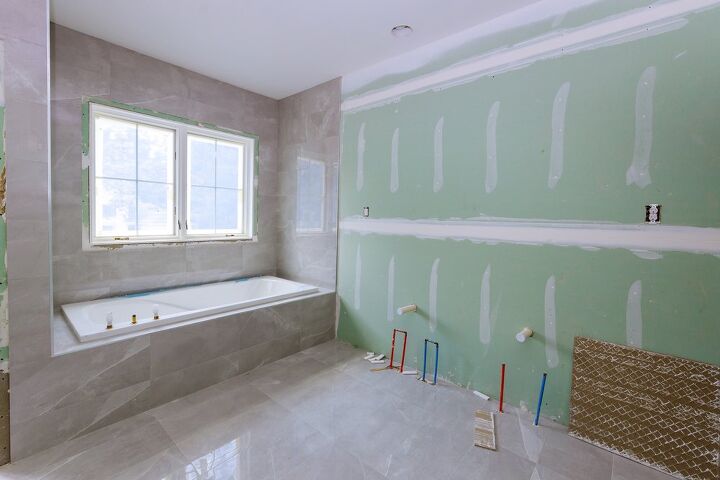
Indeed, you can tile over drywall in the shower. However, it’s best to keep in mind that drywall isn’t a suitable backing material for tile showers. Even if your bathroom has moisture-resistant drywall, it won’t provide the requisite moisture resistance. Over time, water will penetrate the drywall, thus causing your tiles to sag, crack, or even fall off.
Also, when water seeps behind the tiles, there’s the risk of mold and pest infestation. Tiling over drywall in high-moisture rooms like showers comes with the risk of pest infestation. Pests such as termites and carpenter ants thrive in moist environments. When moisture seeps into the drywall, pests will creep in too. Therefore, tiling over drywall is fine, but not in high-moisture rooms like showers.
Do You Need to Hire Shower Installers?
Get free, zero-commitment quotes from pro contractors near you.

Why it’s Not Advisable to Tile over Drywall
Bathrooms and even kitchens are prone to water exposure. Contrary to what the name may suggest, drywall isn’t waterproof. Even if you do a proper tiling job, in the long run, nothing will prevent the drywall from getting soggy due to condensation and water exposure. Besides, tiling over drywall causes wood struts to rot, leading to mold growth. Ultimately, your drywall will deteriorate.
When remodeling your home, tiles should only be installed over drywall in rooms with minimal moisture exposure, including kitchens and around fireplaces. For showers, you’re better off using water-resistant backing materials such as Kerdi-Board or cement on your shower walls before tiling. This will guarantee the tiles’ durability.
Check this out if you want to find the best adhesive for shower tiles.
Preparing Your Shower for Tiling
The most important thing to do when tiling a shower is moisture-proofing the walls. This means using a suitable backing material to replace the drywall, besides sealing the backing material using waterproof joint sealing products.
Drywall, tape and joint compounds, and other similar materials are unsuitable for showers and other high-moisture rooms because they will eventually deteriorate. So, here’s what you need to fully moisture-proof your shower when tiling:
Backing Board
When it comes to waterproofing drywall using a backing board, there are tons of options. Whatever you choose is an upgrade to both typical drywall and other water-resistant drywall options on the market. In this regard, you can either use a specialized backing board like HardieBacker and Kerdi-Board, or a cement backing board.
Cement backing boards are recommended for showers due to their ready availability and ease of installation. Kerdi-board comes with a shower install kit that makes it easier for you to prepare your bathroom wall for tiling. When tiling your wall, avoid using drywall, including the water-resistant options you may come across.
When tiling your shower, it’s best to avoid cutting corners by using water-resistant (blue or green) drywall in showers. These drywall options can hold up in other parts of the house, including the kitchen. Nonetheless, they are unsuitable for the shower.
Waterproof Tape
When backing drywall, the joints between the backing boards should be taped and floated to waterproof them. Avoid going for cheap options such as mud and traditional paper tape because they are not waterproof. Instead, use fiber tape or waterproof to create an impenetrable backing surface that won’t allow moisture to seep into the drywall.
The waterproof backing tape is ideal for your shower if you use a specialized backing board. If you choose a cement backing board, it’s best to go for fiber tape to seal the joints in the backing boards. Also, avoid using conventional drywall tape to seal off joints in the shower backing boards. With time, they will allow water to seep into the backing boards.
Specialized Caulk and Joint Sealant
Just like you need specialized tape to seal off joints between the shower backing boards, you’ll also need to fortify the tape using a joint compound that won’t deteriorate when exposed to moisture. Traditional drywall mud deteriorates quickly when used as a tile substrate.
Consider using specialized caulk and joint sealant instead of traditional drywall mud, especially in seams, corners, and other areas where the backing board meets the shower pan or bathtub. Besides, use the joint sealant to keep the waterproof tape in place, more so over joints.
By using the recommended tape, sealant, and backing board, you’ll be doing enough to make the tiling job a success. For starters, your shower walls will be ready for tiling over drywall. Make sure to use the best adhesive for shower tiles.
Preparing your Drywall for Tiling
Now that you know what’s needed to water-proof drywall, it’s best to know how to prepare drywall for tiling. Remember that your tiles will only last as long as you wish if you prepare the drywall.
Fortunately, this process isn’t difficult, and once you do it right, the longevity of your tiling job will be guaranteed. There are 10 beautiful shower tile alternatives that you can consider.
Preparing Unpainted Drywall for Tiling
When remodeling your bathroom, don’t be surprised if you discover the builder didn’t paint the drywall. If that’s the case, you’ll need to prep it first before backing it for tile mounting. Here’s how to go about it:
Step One: Seal All Seams on the Drywall
If the seams on the drywall need to get sealed, simply apply a skim coat on the entire wall. In doing so, you won’t have to worry about perfect seams.
Step Two: Sand Uneven Areas
Even if the drywall is covered with tile, you’ll still need to ensure the surface is flat and smooth so that the tiles adhere to it easily. Obviously, you don’t want bumpy or lumpy tiles in your shower.
Step Three: Clean/Vacuum the Work Area
To ensure a perfect installation job, clean the work area to get rid of dust and other debris. This will also allow the wall to dry.
Step Four: Use a Primer on the Drywall
There’s no better way to protect drywall from moisture than priming it. This helps to seal the surface, thus preventing moisture penetration.
Preparing Painted Drywall for Tiling
Installing tiles in the shower will be even easier if the drywall is painted. Here are the steps to take:
- Clean the area you intend to tile by removing faceplates for light switches and other outlets. If there’s any trim on the drywall, remove it too.
- Use TSP to get rid of grease buildup from the wall. This will make it easier for the backing material and tiles to adhere to the drywall.
- Fill in holes on the drywall, and also sand away imperfections. You don’t need anything that will make your tiles loosen up once you install them.
How to Prevent Grout Deterioration After Tiling
Shower tiles are vulnerable to deterioration, thanks to the continuous exposure to water, shampoo, soaps, and other chemicals. Over time, they penetrate the grout and tile surface, thus leading to dampness, molding, and even bacteria buildup.
After tiling, it’s essential to take measures to keep the grout and shower tiles looking great since this will prevent deterioration. Here’s what you can do to prevent shower tile and grout deterioration:
Regular Cleaning
There’s no better way to keep the shower tiles and grout grime-free than regular cleaning. All you need is a mild cleanser to get rid of surface grime.
Keep Moisture Under Control
Nothing wrecks more damage to shower tiles and the underlying drywall than moisture. Hence, it’s important to keep moisture under control, especially if you use a steam shower. This could include ventilating the shower, or better still, investing in a dehumidifier.
Hire Professional Cleaners
No matter how good you are at cleaning the shower, it’s advisable to hire professional cleaners once in a while. Having your shower professionally cleaned will go a long way in preventing grout and tile deterioration. It also helps in diagnosing and correcting moisture damage.
Related Questions
What Mortar Should You Use When Tiling the Shower?
Besides the aesthetic appeal that tiles add to the shower, tiling is also done to water-proof the walls. Therefore, it’s best to also use waterproof mortar for tiling. Thin-Set mortar, in particular, is recommended when installing backsplash around bathtubs. You could also opt for a mastic, but it’s not ideal for areas with excess moisture.
Can Large Tiles Be Installed Over Drywall
When undertaking bathroom remodeling, some homeowners prefer large tiles over small ones. Since these tiles are heavier, you may find yourself wondering whether they are suitable for installation over drywall. Well, with proper backing, you can also use large tiles in the shower.Extra caution should be taken when installing large tiles in the shower over drywall. The weight per square footage of these tiles exceeds what’s recommended for drywall (15 pounds). Thus, the drywall should be wall prepared before tiling. Furthermore, use the right mortar when installing the larger tiles. Their size and weight makes them more vulnerable to moisture damage than smaller tiles.
Do You Need to Hire Shower Installers?
Get free, zero-commitment quotes from pro contractors near you.
Key Takeaways
Installing tiles in the shower goes a long way in increasing your home’s value and aesthetic appeal. Nevertheless, you can only tile over drywall in a shower after installing backing boards on the drywall. To ensure that your tiles last long, it’s best to take measures such as waterproofing the tiles and controlling moisture.

We are a team of passionate homeowners, home improvement pros, and DIY enthusiasts who enjoy sharing home improvement, housekeeping, decorating, and more with other homeowners! Whether you're looking for a step-by-step guide on fixing an appliance or the cost of installing a fence, we've here to help.
More by Upgraded Home Team


![Standard Dining Room Table Dimensions [for 4, 6, 8, 10 and 12 People]](https://cdn-fastly.upgradedhome.com/media/2023/07/31/9074335/standard-dining-room-table-dimensions-for-4-6-8-10-and-12-people.jpg?size=350x220)


