Can You Paint Over Polyurethane? (Find Out Now!)
Since home décor trends change so frequently, the easiest and most affordable way to keep up with them is painting. However, what do you do if the surface that you want to paint over has a coat of polyurethane? In this case, many homeowners find themselves asking the question: can you paint over polyurethane?
In short, as long as the surface is prepared properly, you can paint over polyurethane. This project requires some patience, often a whole lot of sanding, and oil-based products to properly adhere to polyurethane finishes.
Most wood furniture comes with a polyurethane top coating that can make immediate décor changes rather difficult. However, if you follow all the necessary preparation steps, you can successfully paint over finished wood to update its appearance. If you don’t, you will end up with peeling paint, rendering your entire paint job useless.
As long as you follow the steps outlined below, you can effectively paint over polyurethane and avoiding any peeling!
Do You Need Painting or Staining Services?
Get free, zero-commitment quotes from pro contractors near you.

What is Polyurethane?
Polyurethane is essentially a plastic finish that is in liquid form until it dries. For topical applications, it is used in paints, varnishes, foams, adhesives, and sealants. As a topcoat, it can be found in both oil- and water-based options, and exists in many varieties from glossy to satin.
Its main purpose is to protect the surface of the wood from scratching, scuffing, or other potential damage. Polyurethane is available in a spray can for easy application, or “wipe-on” for woodworkers to create a hand-rubbed finish.
Water-based polyurethane is arguably the most popular choice for a topcoat, due to its low toxicity and low odor properties. When compared to oil-based varieties, water-based polyurethane goes on clear without adding any color and dries much quicker.
Similar to shellac, the water-based option does not hold up well under heat and chemicals. It is the ideal choice for side tables, bookcases, picture frames, desks, and virtually anything that won’t be exposed to extremes. Oil-based polyurethane is marginally more durable than water-based, especially when it relates to heat. This choice works great on kitchen tables and adds a slight color that will enhance the richness of natural wood.
Safety First
Before you begin prepping the surface that you intend on painting, you should take all the necessary steps to protect yourself and your workspace. Since your prep work will likely involve the use of a chemical, this step is absolutely essential.
- Always read the labels of the products that you will be using first and adhere to the outlined safety recommendations. Many lacquers, varnishes, stains, and oil paints are incredibly toxic.
- Keep the products out of reach of children and consider closing off the area to children and pets while you’re working.
- Always work in a well-ventilated space. Open doors, windows, and install fans to increase air circulation in the area.
- Wear the necessary protective gear such as eyewear, gloves, and a respirator. Avoid any contact with the skin. Wearing a respirator is very important when working with polyurethane and other toxic products.
- Leave the area frequently to access fresh air. Walk outside or into another room and away from the project area to reduce the impact on your lungs.
- NEVER work near heat sources or smoke while working, as many of these products are highly combustible and flammable.
- Properly dispose of soiled rags and waste after use in a metal container that is filled with water. All solvents must be taken to a local facility for appropriate disposal.
How to Paint Over Polyurethane
For this project, you’ll want to first gather all of the essential materials before you begin. This will ensure a smooth process and results that you are pleased with.
Materials Needed:
- Clean, cotton rags
- Respirator or protective face mask
- Mineral spirits or trisodium phosphate (TSP)
- Wood filler
- Gloves
- Protective eyewear
- 200- to 400-grit abrasives
- Drop cloth
- Oil-based primer/sealer
- Oil-based paint
- Natural bristle brushes
For a smoother, more professional finish, you can opt for a spray gun instead of a brush when painting over the polyurethane.
Step One: Preparing the Space
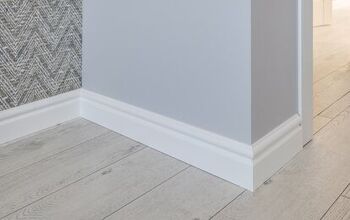
Before you start preparing the actual item you will be painting, you need to determine where you will perform the work. Can you bring the project outdoors? Or, does the work need to be done indoors, as is the case for room or window trim?
If you’re going to work outside, choose a space where you won’t potentially damage any patios or landscaping. Also, you’ll want to avoid direct sunlight and work in the shade. Prolonged exposure to the sun will speed up drying time and may ruin your finish.
For work indoors, make sure that you have the necessary ventilation. Place a box fan by a window to blow air outside, and another at a window on the opposite end to bring fresh air in. Then, remove all the furniture and floor coverings and layout drop cloths to protect your flooring.
Step Two: Clean the Polyurethane Surface
Once you’ve prepared your workspace, you can start cleaning the surface you will be working on. At this point, you’ll also want to remove any knobs and other hardware if you’re working with cabinets or pieces of furniture. Then, moving in a circular motion, wipe the surface clean with a clean cloth and mineral spirits. For heavy-duty cleaning, you can use TSP, or trisodium phosphate.
This chemical is great for cleaning heavy deposits of smoke, greasy grime, and general tough stains. It also mixes well with hot water and works at removing mildew and mildew related stains. Dampen a cotton rag with the TSP and thoroughly wipe down the surface. Wash all surfaces that will be painted and allow them to dry fully before you proceed.
Step Three: Fix Any Surface Imperfections
With a clean wood surface, you can now get a better look at its condition. At this point, you’ll want to determine whether or not the surface is smooth enough and if there are any dents, scratches, or dips that need to be corrected. In most cases, you will have some imperfections in the woodwork to eliminate.
Do not avoid this step and assume that your primer and paint will go on smoothly and hide any of the surface irregularities. By doing this, you risk improper adhesion and paint that flakes or blisters. For best results, fill the scrapes, holes, or scratches using a wood filler.
If you come across larger, more complicated imperfections such as rotten wood, missing chunks, or big cracks, consider having a professional carpenter take a look. They will be able to assess the situation and restore the surface if needed.
Step Four: Sand the Wood Surface
The key to successfully painting over polyurethane is to etch and degloss the finish. You need to create the ideal bonding environment by sanding down the surface. Sanding down polyurethane finish will allow your new coat of paint to go on smoothly, bond tightly, and be long-lasting.
- Sand the entire polyurethane surface with a fine-grade sandpaper. You can use a power rotary tool, sanding sponge, sanding block, or oscillating sander.
- Sand until you’ve achieved a surface that is smooth and the wood has lost its sheen and gloss.
- For this step, you’ll definitely want to wear a protective face mask, as the dust from polyurethane is toxic.
- Take your time. Although this is a tedious process, it is the most important step to ensure successful painting over polyurethane.
- Liquid sandpaper is an alternative that you can use to dissolve the polyurethane finish. Apply according to the directions on the bottle.
- Once you’ve finished sanding, remove dust and clean the surface using a clean cloth and mineral spirits.
- Vacuum up the toxic polyurethane dust before proceeding.
Step Five: Priming the Surface
The next step is to apply a thin coat of oil-based primer to the surface of the wood. Do not skip this step. Primer is essential to providing the best conditions for the topcoat to adhere. It will also keep any of the stains on the wood from escaping through the paint.
Apply the primer in careful, even strokes to avoid any visibly thick spots on the surface. Allow the first coat enough time to cure until it is dry to the touch. Follow up with a second coat of primer and for best results, let it dry overnight. If you do not notice any wood grain peeking through the primer, you can forego the second coat of primer and just let the first coat dry overnight.
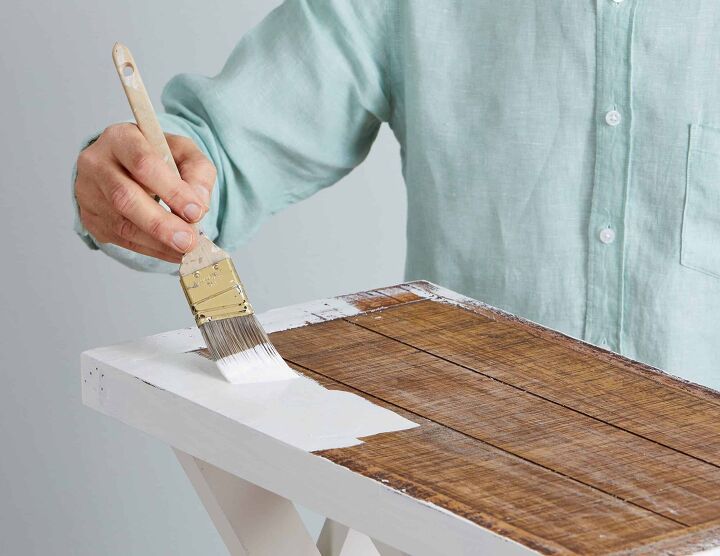
Step Six: Applying Paint
With the polyurethane properly sanded and primed, your preparation work is complete. You can now start applying paint to the surface of the wood. Apply a single coat of oil-based enamel paint in the same way that you applied the primer.
Move in long, even strokes across the entire wood surface. Make sure that the first coat has 24 hours to dry before you consider applying any additional coats of paint. Lightly sand the surface in the morning and wipe it clean with mineral spirits and a cotton cloth. Then, allow all of the coats up to 72 hours to dry before you replace any of the hardware.
Quick Tips: If desired, you can finish off by applying a wipe-on polyurethane varnish to protect your paint job. Also, if time is a concern, you can substitute the oil-based paint for a high-quality 100% acrylic paint.
Do You Need Painting or Staining Services?
Get free, zero-commitment quotes from pro contractors near you.
Related Questions
Is Deglosser better than sanding?
Deglosser, or liquid sandpaper, contains chemicals that will dissolve the finish on wood surfaces. It is sometimes preferred over traditional sanding methods since it is much faster and can be easily applied with a soft cloth in sections. The process of wiping everything down with a deglosser, allowing it to work its magic, and dry completely takes about 30 minutes. However, deglosser contains solvents and chemical-resistant gloves, eye protection, and breathing protection must be worn when using this product. If you want to avoid using chemicals, you may want to sand instead.Sanding does have its own health issues related to dust and you’ll also want to protect your eyes and lungs from exposure. Also, sanding notoriously takes a considerable amount of time. You could potentially spend all day sanding, as opposed to 30 minutes when deglossing. Although, if your surface needs smoothing in any way, sanding’s abrasive qualities are the only way to achieve this. So, the answer as to which method is better comes down to preference and the nature of the surface you are working with.
Can you paint over varnished wood without sanding?
In short, yes you can paint over varnishes surfaces without sanding first. However, it is absolutely not recommended. In fact, it is very common for the topcoat of paint to peel off when you have a clear coat of varnish underneath. In order to avoid this, you should always remove that layer of varnish by sanding or applying deglosser.

Jessica considers herself a home improvement and design enthusiast. She grew up surrounded by constant home improvement projects and owes most of what she knows to helping her dad renovate her childhood home. Being a Los Angeles resident, Jessica spends a lot of her time looking for her next DIY project and sharing her love for home design.
More by Jessica Stone