Are KitchenAid Attachments Dishwasher Safe? (Find Out Now!)
If you bake often, your KitchenAid mixer likely sees a lot of use. Although a KitchenAid mixer is a major investment, with the proper maintenance and cleaning, it can last pretty much forever. Since you can’t simply soak your mixer in your kitchen sink, it requires more specialized care.
The attachments are what make your stand mixer functional, but they also need special care. For this reason, you may find yourself wondering: “Are KitchenAid attachments dishwasher safe?” The bowl, coated dough hook, and coated flat beaters are the only attachments that can be placed in the dishwasher. Burnished beaters, burnished dough hooks, and wire whips should be hand washed instead.
For even the neatest cook, a dash of vanilla, sprinkle of flour, and crack of an egg here and there can make for a very messy mixer. To keep your KitchenAid mixer in tip-top shape, you must know how to properly clean both the body and the attachments.
Do You Need a Maid Service?
Get free, zero-commitment quotes from pro contractors near you.

Cleaning a KitchenAid Mixer
Cleaning your KitchenAid mixer becomes less of a chore when you take the time to wipe it down after each use. Though, if you haven’t developed that practice, it doesn’t take a lot of effort to have your mixer looking good as new. Follow these steps to effectively clean your KitchenAid mixer:
- Always unplug your KitchenAid mixer after each use and before cleaning. If water gets into the appliance while it’s still plugged in, you risk sparks or even electrocution.
- Remove the bowl and all the attachments, placing them aside to be cleaned later.
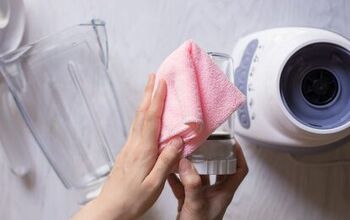
- Moisten a soft cloth with warm water and wipe down the stand. Make sure that the cloth is only damp, not dripping with water. Wipe down all surfaces of the stand, even if there is no visible dust or debris. Only microfiber or some other soft cloth should be used, as abrasive cleaners or scouring pads will damage the mixer’s finish.
- Use baking soda on stains or marks that cannot be easily wiped off. Put a small amount of baking soda onto your damp cloth and gently dab the stain. If the stain is too stubborn, cover it in baking soda and let it sit for 5 to 10 minutes. Then, wipe the baking soda off and remove any residue using a clean, moist cloth.
- Get into nooks and crannies of the mixer using a toothpick, toothbrush, or bottle brush. Use either tool to gently loosen the material in the cervices, then wipe it away with a damp cloth. Make sure that the toothpick, toothbrush, or bottle brush stays dry, as moistened debris is more difficult to remove.
- Angle the mixer’s head back to clean under it. Use a moist cloth to clean the area of the shaft where the attachments connect. Before tilting the head back into place, make sure that you dry the underside thoroughly.
- Don’t forget to clean the base of the mixer. Drips and debris can seep underneath the appliance and result in rust. Use a damp cloth to clean off the base and, if necessary, use a toothbrush or toothpick to free any debris out from inside of the small crevices of the base.
If your mixer is especially dirty, using just warm water may not cut it. Instead, you should try to implement a cleanser. We recommend using window cleaner over any other type of kitchen cleaner, as it won’t leave a film that attracts dust and does not need to be rinsed off.
Quick Tip: You can also make your own cleanser by combining one cup of water, one cup of rubbing alcohol, and one tablespoon of white vinegar into a spray bottle. However, don’t use cleanser every time you clean your mixer, as it can wear down the finish.
How to Clean KitchenAid Attachments
One of the many benefits of these machines is the wide array of accessories that can significantly expand the capability of this singular appliance. Attachments are, arguably, the most important components of your KitchenAid mixer. From milling grain and dicing vegetables, to making homemade pasta and ice cream, the options are nearly endless!
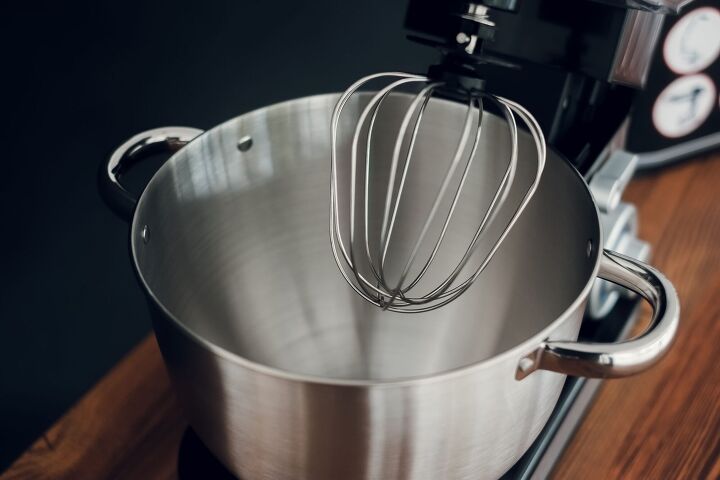
KitchenAid mixer attachments require special care in order to maintain them. Some attachments are coated, meaning they are safe to be placed in the dishwasher. These are typically white, such as the dough hook and flat beater. Unless you purchased a stainless-steel whisk, then you’ll need to hand wash your whisk – as it’s likely made of aluminum, which causes oxidation in the dishwasher.
- KitchenAid switched to dishwasher-safe beaters in 2018, allowing for easier cleanup. So, you purchased your mixer after 2018, the beaters can be placed in the dishwasher.
- If you have the older, burnished beaters, these should be hand washed and dried immediately afterwards.
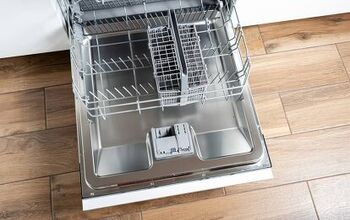
The KitchenAid mixing bowls, on the other hand, are all dishwasher safe. Rinse the mixing bowl immediately after use, then place in the dishwasher on either the top or bottom rack. If you plan on using the mixing bowl more than once, you can also wash it by hand with warm water and soap.
Removing Stains from KitchenAid Attachments
If your beaters, whisks, or mixing bowl get rusted or stained, you can clean them with a baking soda and vinegar paste. Put some baking soda in a small container first and add vinegar until you reach a paste-like consistency. Then, rub the mixture on the stains or rust and it should be removed in about 10 minutes.
For stubborn stains and rust, you may need to let the paste sit for a couple of hours. Then, rinse it thoroughly to remove any lingering residue. Never scrub stains or rust, as it will only make them worse.
Do You Need a Maid Service?
Get free, zero-commitment quotes from pro contractors near you.
How to Store KitchenAid Attachments
After you’ve cleaned your mixer attachments, it’s important to store them properly. Never leave them out, as this will allow them to gather dust and oils. Instead, to keep your attachments clean, put them away in a cupboard or drawer after each use. If you have limited cupboard space, you can put them in your mixer’s mixing bowl. Though, you’ll want to line the bowl with a towel to protect it from scratches.
Related Guides

Jessica considers herself a home improvement and design enthusiast. She grew up surrounded by constant home improvement projects and owes most of what she knows to helping her dad renovate her childhood home. Being a Los Angeles resident, Jessica spends a lot of her time looking for her next DIY project and sharing her love for home design.
More by Jessica Stone


![How To Reset A Whirlpool Cabrio Washer [In 5 Easy Steps!]](https://cdn-fastly.upgradedhome.com/media/2023/07/31/9076531/how-to-reset-a-whirlpool-cabrio-washer-in-5-easy-steps.jpg?size=350x220)