Anchoring Cement Vs. Anchoring Epoxy: What's The Difference?
Nowadays contractors and DIYers alike are starting to shy away from embed-plate and cast-in-place anchoring systems, as these processes are often expensive and time-intensive to install. The two most common alternatives are anchoring cement and anchoring epoxy, which are becoming increasingly popular.
Both of these solutions can help expedite project timelines, and reduce the risk of anchor problems since the exact placement of the bolts don’t have to be done during the casing of the concrete. Epoxy and anchoring cement can be used for anchoring handrails or securing bolts, rebar dowels, and threaded rods into concrete and masonry substrates. Since both are affordable and easy solutions to avoid more traditional methods, how do you know which product to choose?
With that said, let’s take a look at what exactly anchoring cement and anchoring epoxy are, what they’re used for, how to apply them, and which product would be best for your project – Anchoring cement or anchoring epoxy?
Do You Need Concrete Foundation Installers?
Get free, zero-commitment quotes from pro contractors near you.

What is Anchoring Cement?
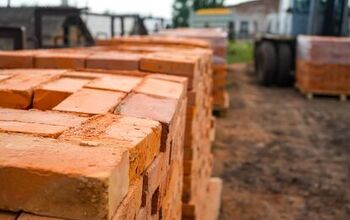
Available from a number of manufacturers, anchoring cement is a pourable, rapid-setting, expansive type of cement that cures to provide greater strength than concrete. It expands as it hardens to fill holes, locking itself in place. This product is essentially used for anchoring any sort of metal to concrete – whether it’s bolts, handrails, or repairing wrought iron railings. It can be used for both interior and exterior applications and is also suitable for use in any consistently wet environments.
Anchoring cement is appropriate for use with a wide range of construction applications, including bolts, posts, motors, pipes, hooks, conduits, appliances, conveyors, in addition to parking meters, columns, seats, fences, signs, door stops, ornamental ironwork, and more.
How to Install Anchoring Cement
Prior to installing anchoring cement, make sure that you consult the label directions and manufacturer recommendations for proper handling and storage. Then, you can proceed with the installation by following these steps:
- Using a masonry core drill or chisel, create a hole in the concrete that is at least 1 inch larger than the size of the railing or bolt and between 2 and 4 inches deep. Increasing depth will also increase the pullout strength.
- Remove any loose concrete or debris from inside of the hole.
- Prior to pouring the anchoring cement, dampen the hole. However, do not leave any standing water in the bottom.
- To properly prepare the anchoring cement, combine 5 parts cement with 1 part clean water in a clean container and mix vigorously. This will yield a pourable mixture. For a mixture that is more putty-like (necessary for vertical applications), reduce the amount of water.
- Pour the mixture into the hole so that it is slightly above the floor level.
- Hold the bolt or post in position until the anchoring cement starts to stiffen. The product should set within 10 to 30 minutes.
What is Anchoring Epoxy?
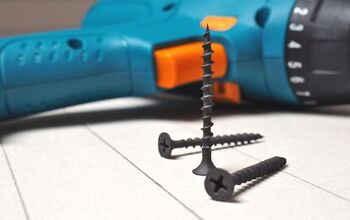
Anchoring epoxy, on the other hand, is a two-component compound that is also used for anchoring bolts and other metal items into concrete or masonry. Like anchoring cement, it is rapid setting and can be used in both vertical and horizontal applications. Once cured, anchoring epoxy is incredibly strong, hard, and does not shrink.
The exceptional strength of anchoring epoxy gives it the ability to handle very heavyweight loads, and be used for both projects around the home and commercial applications. It takes about 15 minutes to set and, depending on the product, will reach full cure in 10 or 24 hours.
How to Apply Anchoring Epoxy
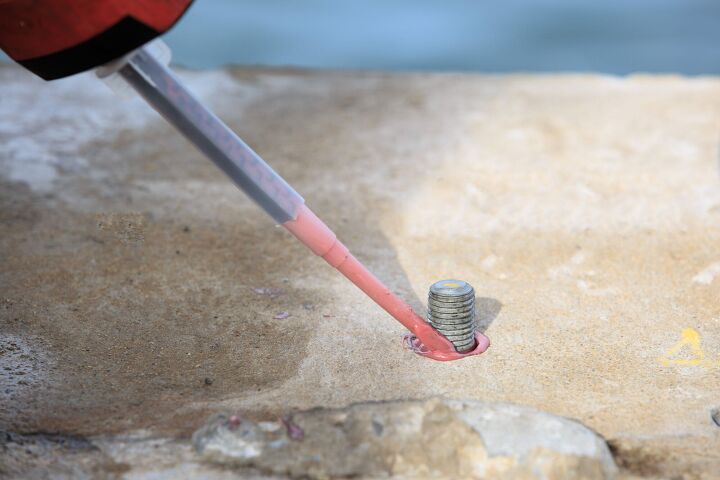
The process of applying anchoring epoxy is very different from installing anchoring cement. Before you start, you’ll want to make sure your eyes and skin are protected, you’re wearing chemical-resistant gloves, and have a heavy-duty professional caulking gun. Always prepare the anchor holes properly before you start placing the anchoring epoxy.
In most cases, the diameter of the hole should be 1/8 inch greater than the anchor diameter and the depth should be nine times the anchor diameter. The recommended minimum depth for the hole is 1 inch. For specifics, consult project specifications and regulations. Follow these steps for success, beginning with drilling the anchor holes:
- Once you determine the proper diameter and depth, drill the holes accordingly.
- Blow out all the dust from the bottom of the hole, brushing and blowing out repeatedly to clear any remaining debris. Before placing the epoxy, the hole must be clean and free of standing water.
- With your gloves on, remove the plastic cap and plugs on the cartridge and attach the mixing nozzle to the cartridge – matching white to white.
- Discard the first bit of product that comes out until a uniform color is achieved.
- Dispense the epoxy at the base of the hole, slowly withdrawing the nozzle and filling about 5/8 of the hole. That way, once the metal rod is inserted, the hole is completely full.
- Insert the rod or rebar into the epoxy and turn clockwise.
- Remove excess material and let the product set for about 4 hours – longer for colder temperatures. If you don’t remove the excess material right away and it cures, you must use mechanical methods of removal that won’t cause damage the substrate.
It’s important to move quickly and carefully when working with anchoring epoxy, as the mixing nozzle will harden in 20 minutes if it’s not in use. Never attempt to force hardened product out of the nozzle. Instead, use a new nozzle to prevent rupturing the entire container.
Anchoring Cement vs. Anchoring Epoxy
Now that we’ve taken a look at each product individually, it’s time to put them against each other to determine which one may be better for your intended purposes.
Application
Right off the bat, the major advantage that anchoring epoxy has over anchoring cement is the fact that it is ready-to-use. Anchoring epoxy comes in a single cartridge and only requires the use of a caulk gun to apply. Whereas, anchoring cement must be correctly mixed with water to form the proper consistency before it can be poured into or applied to a void.
However, with both anchoring cement and anchoring epoxy, the anchor holes must be drilled to the appropriate depth and diameter. They also must be clean, clear of debris, and free of standing water.
Temperature
Another significant distinction between the two products is the temperature required during application. Although anchoring cement does not specify an ideal temperature, anchoring epoxy does. Ideal application temperature for anchoring epoxy is between 40 and 70 degrees Fahrenheit.
Although you can still use epoxy in lower temperatures, it may take several additional hours to cure. When exposed to cold temperatures, the epoxy can become more viscous and be difficult to install. Therefore, in temperatures below 40 degrees, the cartridge must be warmed to improve handling and curing.
Cost
Cost is another consideration that may lean you more towards one product over the other. With that said, here’s what you can expect to spend, on average, for these two types of anchoring products:
| Product | Price |
| 8.6 oz. High Strength Anchoring Epoxy | $24.87 |
| 8.6 oz. Fast-Setting Anchoring Epoxy | $22.47 |
| 10 lb. Anchoring Cement | $11.56 |
| 20 lb. Anchoring Cement | $22.47 |
While both anchoring cement and anchoring epoxy may seem equal in terms of cost, you get more product for your money when you opt for anchoring cement. Of course, you may choose to pay a little extra for the convenience of epoxy, but for those looking to save money, anchoring cement is the more affordable choice.
Do You Need Concrete Foundation Installers?
Get free, zero-commitment quotes from pro contractors near you.
Related Questions
Can you use anchoring cement as mortar?
Due to the exceptional strength and expansive nature of anchoring cement, it is not recommended to be used as mortar. The mortar that you use for repairing brickwork should not be stronger than the original mortar.
How long does anchoring epoxy take to cure?
Curing times of anchoring epoxy can vary between four and 48 hours, depending on the specific product and manufacturer. Though, to put things in perspective, Sakrete Rapid Setting Anchoring Epoxy’s takes 10 hours at 75°F and 8 hours at 110°F to cure to full strength, while Sakrete High Strength Anchoring Epoxy cures in 24 hours.

Jessica considers herself a home improvement and design enthusiast. She grew up surrounded by constant home improvement projects and owes most of what she knows to helping her dad renovate her childhood home. Being a Los Angeles resident, Jessica spends a lot of her time looking for her next DIY project and sharing her love for home design.
More by Jessica Stone